Turn Old Envelopes Into Junk Journal Pockets
Ever wondered how to turn old envelopes into junk journal pockets? Old envelopes can be easily repurposed into lovely, useful pockets for your journal, and it’s a much simpler process than you might think. They’re perfect for tucking away ephemera or little notes, and they’re a staple inside my Life Junk Journal.
This tutorial shows you how to take an envelope and repurpose it into a pocket inside your junk journal.
Let’s dive right in.
STEP 1: grab some old envelopes.
When you’re looking at how to turn old envelopes into junk journal pockets, any old envelopes can be used, but I have at least 100 old standard letter envelopes that have been hanging around my home for years.
Some of those envelopes get used for post, but we have so many! So I decided to turn them into pockets for my Life Junk Journal. The images below show you the type of envelope I used.
A tip here – if you look at the images you’ll see that the tab used to close the envelope is almost rectangular (rather than triangular), that tab is the part that is glued into the journal to secure it in place. You can use envelopes with triangular tabs as well – you’ll just need to cover the triangular part with junk journal ephemera once it’s stuck in your journal.
Always check the placement of your envelope in your junk journal first, if you need to trim the edges of the envelope down do so – I had to take about 1/2 cm off one side of my envelope so that it would fit top to bottom inside my Life Junk Journal.
This will all make sense as we move through this step by step guide showing how to turn old envelopes into junk journal pockets.
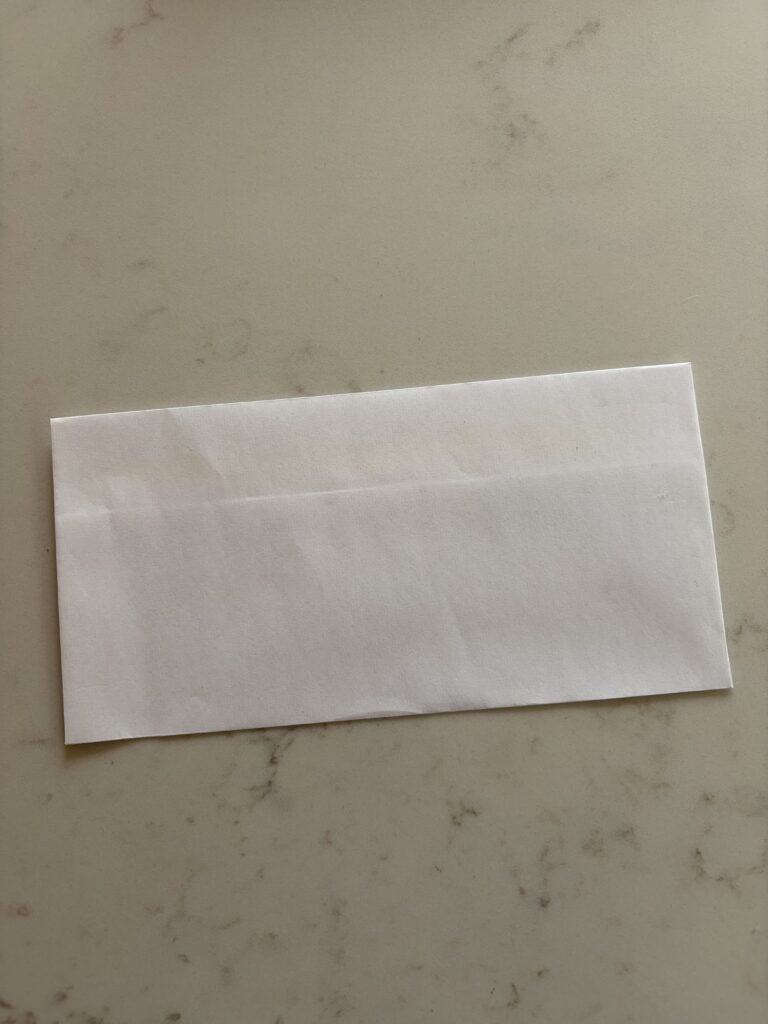
The envelopes I’ve used for pockets in my Life Junk Journal
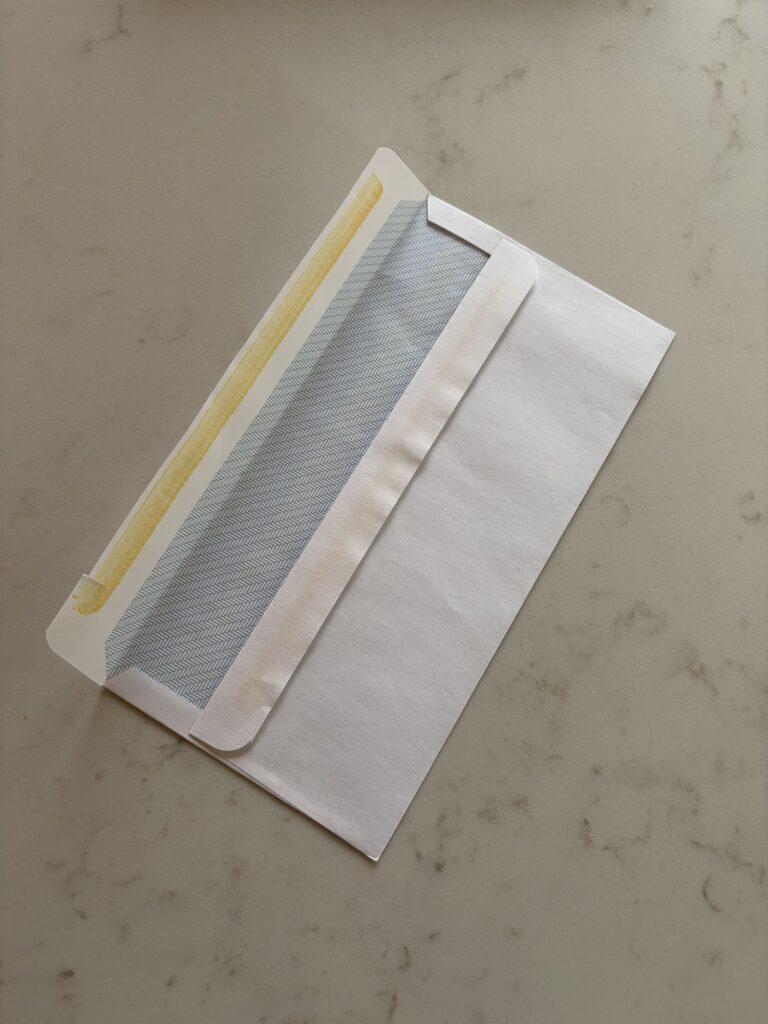
Rectangular type tab on the envelope with self seal that is very old!
STEP 2: PREPARE THE ENVELOPE
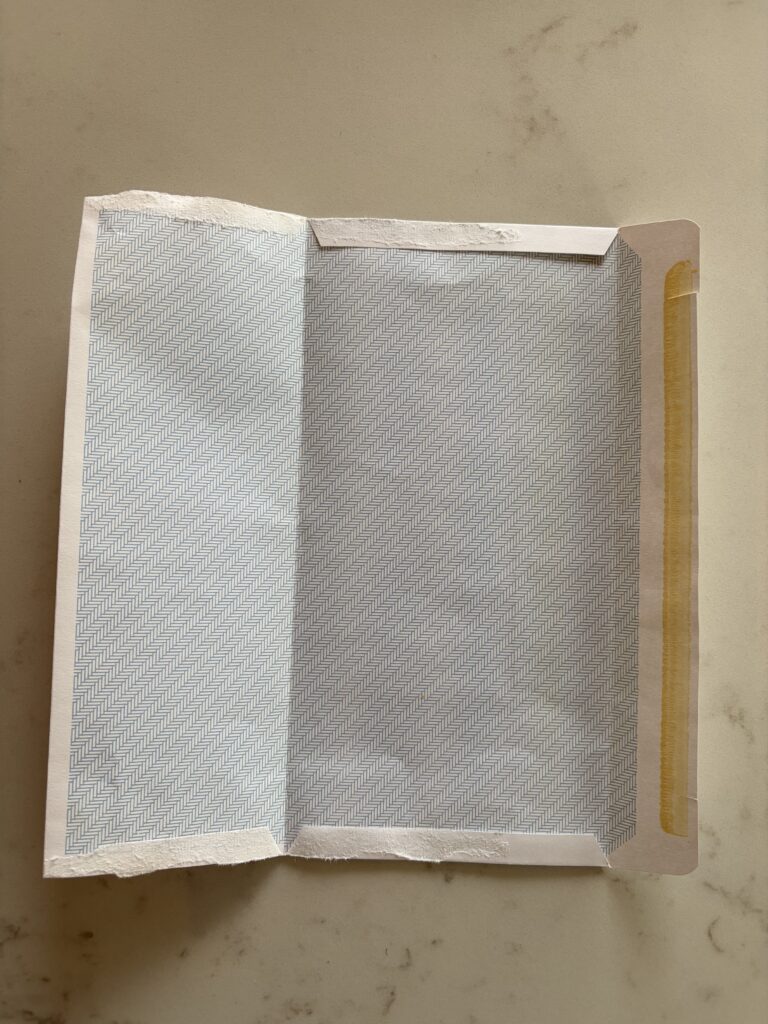
Start by opening the envelope right up so that it lays flat as one piece. Don’t worry if it rips and tears as you open the envelope up – this build out is very forgiving and you’ll be covering both the inside and outer side of your envelope with your favourite junk journal ephemera.
step 3: get creative!
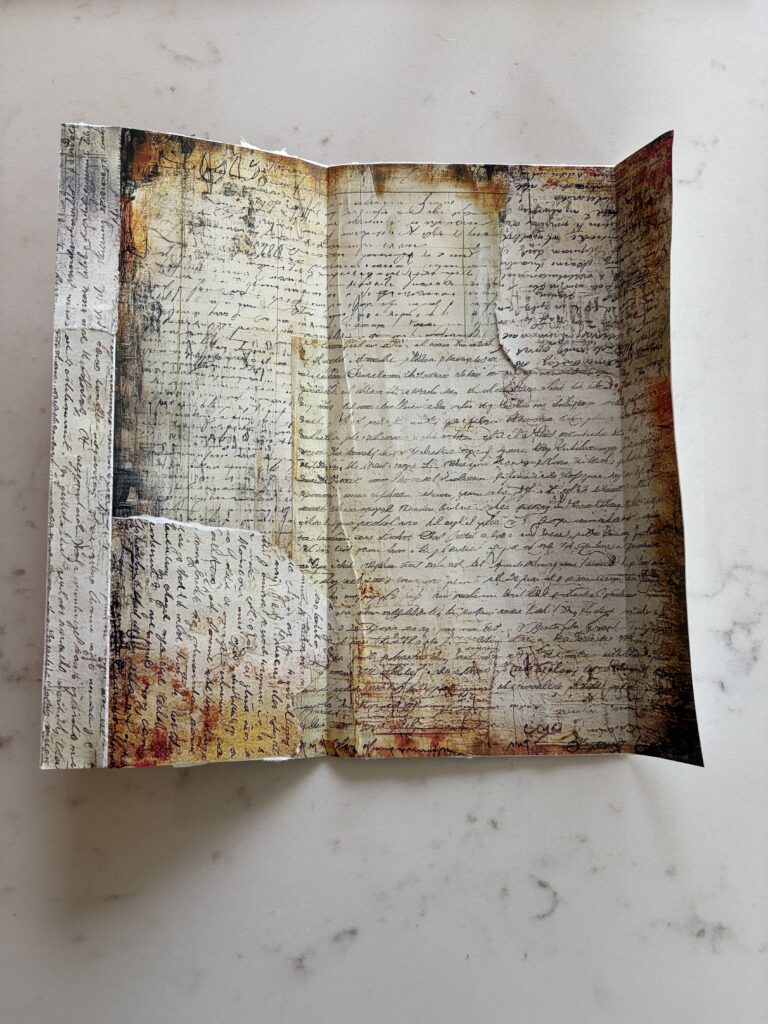
Cover the entire inside of the envelope with your favourite junk journaling scraps. This should include covering the rectangular tab that closes and seals an envelope. You’ll see in the image below I’ve covered the entire inside of the envelope.
step 4: score the envelope.
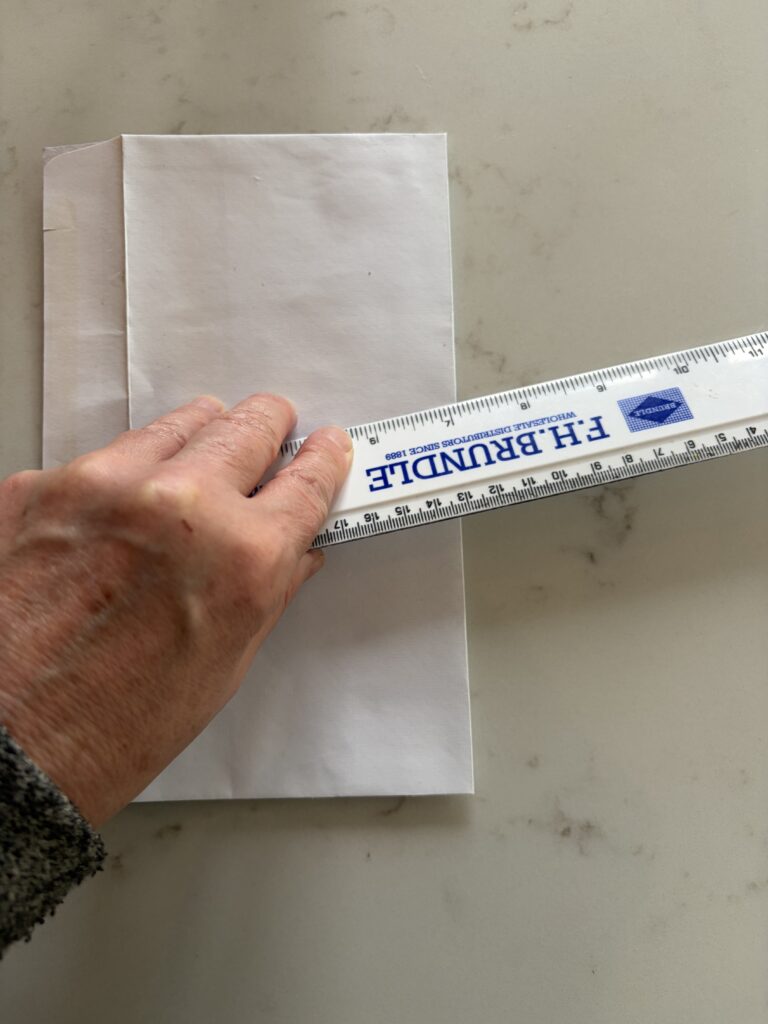
Take a minute to score the natural folds of the envelope with a ruler or paper scorer – it’s easier to do this at this stage before you cover the front of the envelope with junk journal supplies. I turn the envelope over to the uncovered side and score on that side – it’s easier.
step 5: cover the outside of the envelope
Go to the side of the envelope that’s not yet covered and add your junk journal ephemera to it.
At this point, make sure that you leave the top rectangular tab of the envelope uncovered. This will be the edge that you stick to your junk journal and it will therefore be hidden and won’t need stickers or other ephemera on it.
Once you’ve covered the outer side of your envelope, score the natural folds of the envelope firmly again.
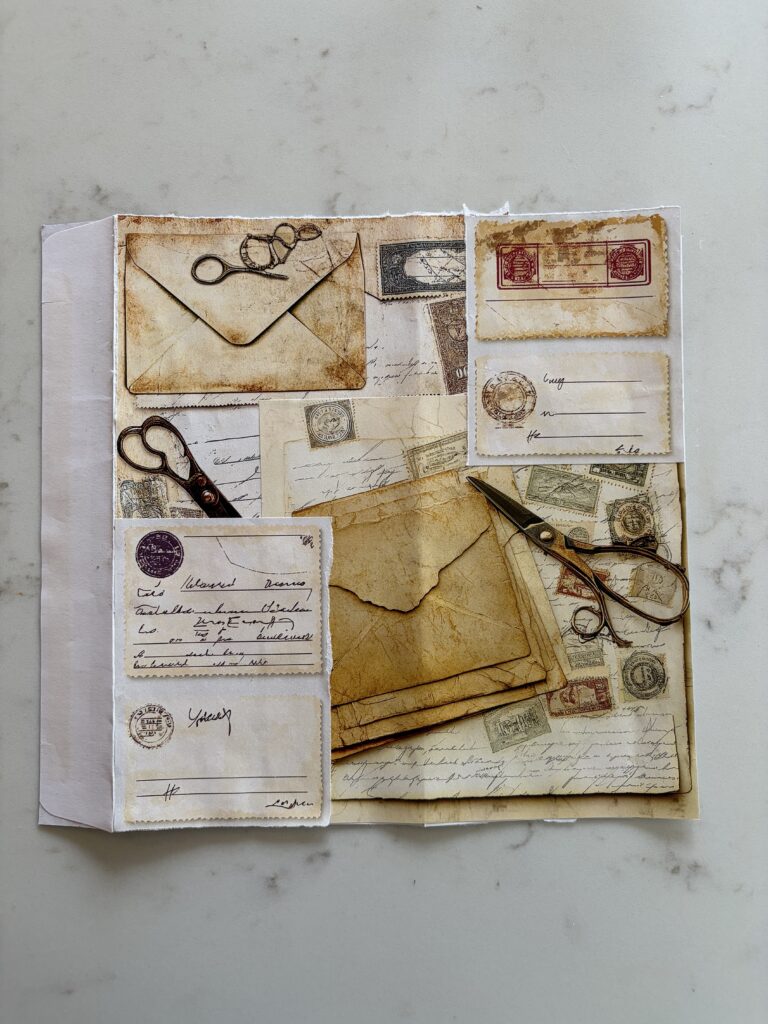
Outside of envelope covered in ephemera – leaving the top tab blank.
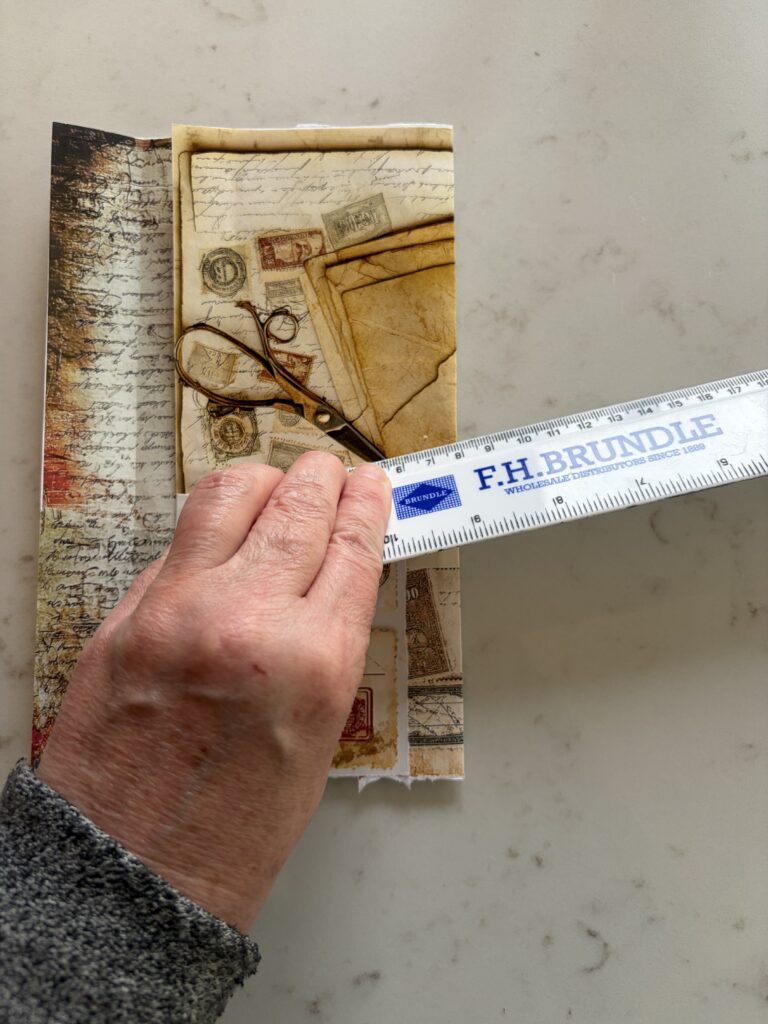
Scoring the natural folds of the envelope.
STEP 6: SEALING THE ENVELOPE EDGES
Add some washi tape along the top inner edge of the envelope to add strength there – that’s the point where you’ll be slipping notes and other ephemera inside the envelope, and it needs enough sturdiness to cope with this.
Fold your envelope back up as it would have been originally, and seal down both edges. It’s easy to do this with cellotape or washi tape – this is preferable to using glue as doing so could seal too much of the inside of the envelope, making it less easy to add bits and pieces inside.
Trim off any bits of washi you need to, and if you feel it’s needed add more than one strip of wash at each side to add strength. It doesn’t need to be perfect – it just needs to be built to last!
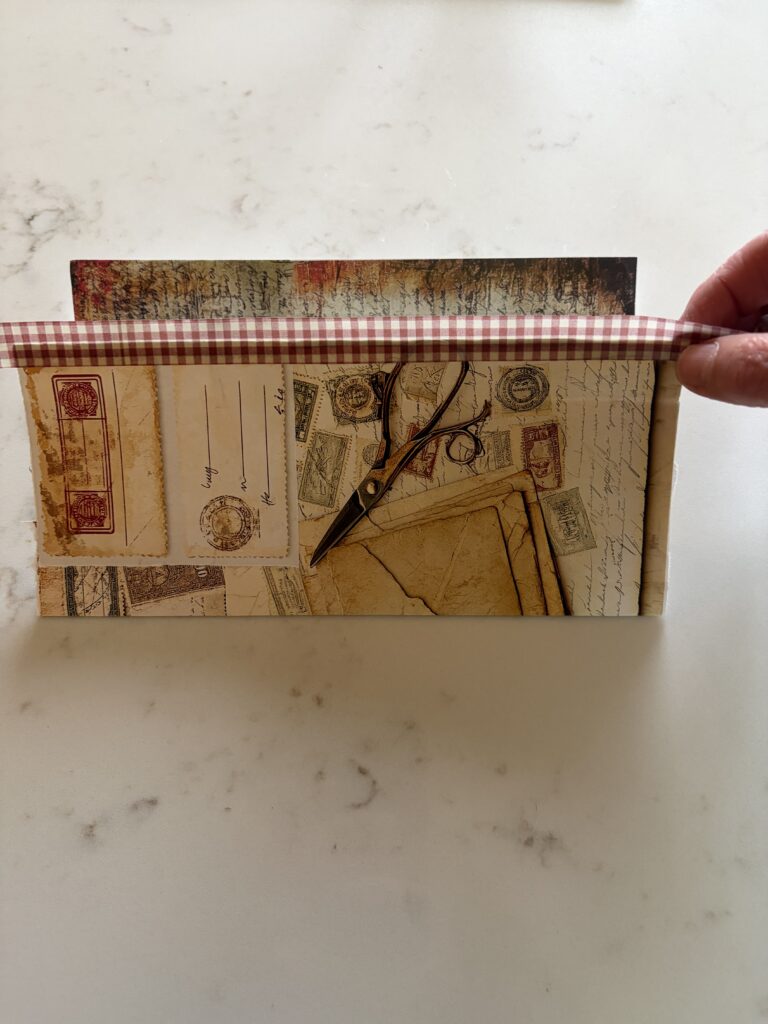
Add washi tape to the top inner edge of the envelope.
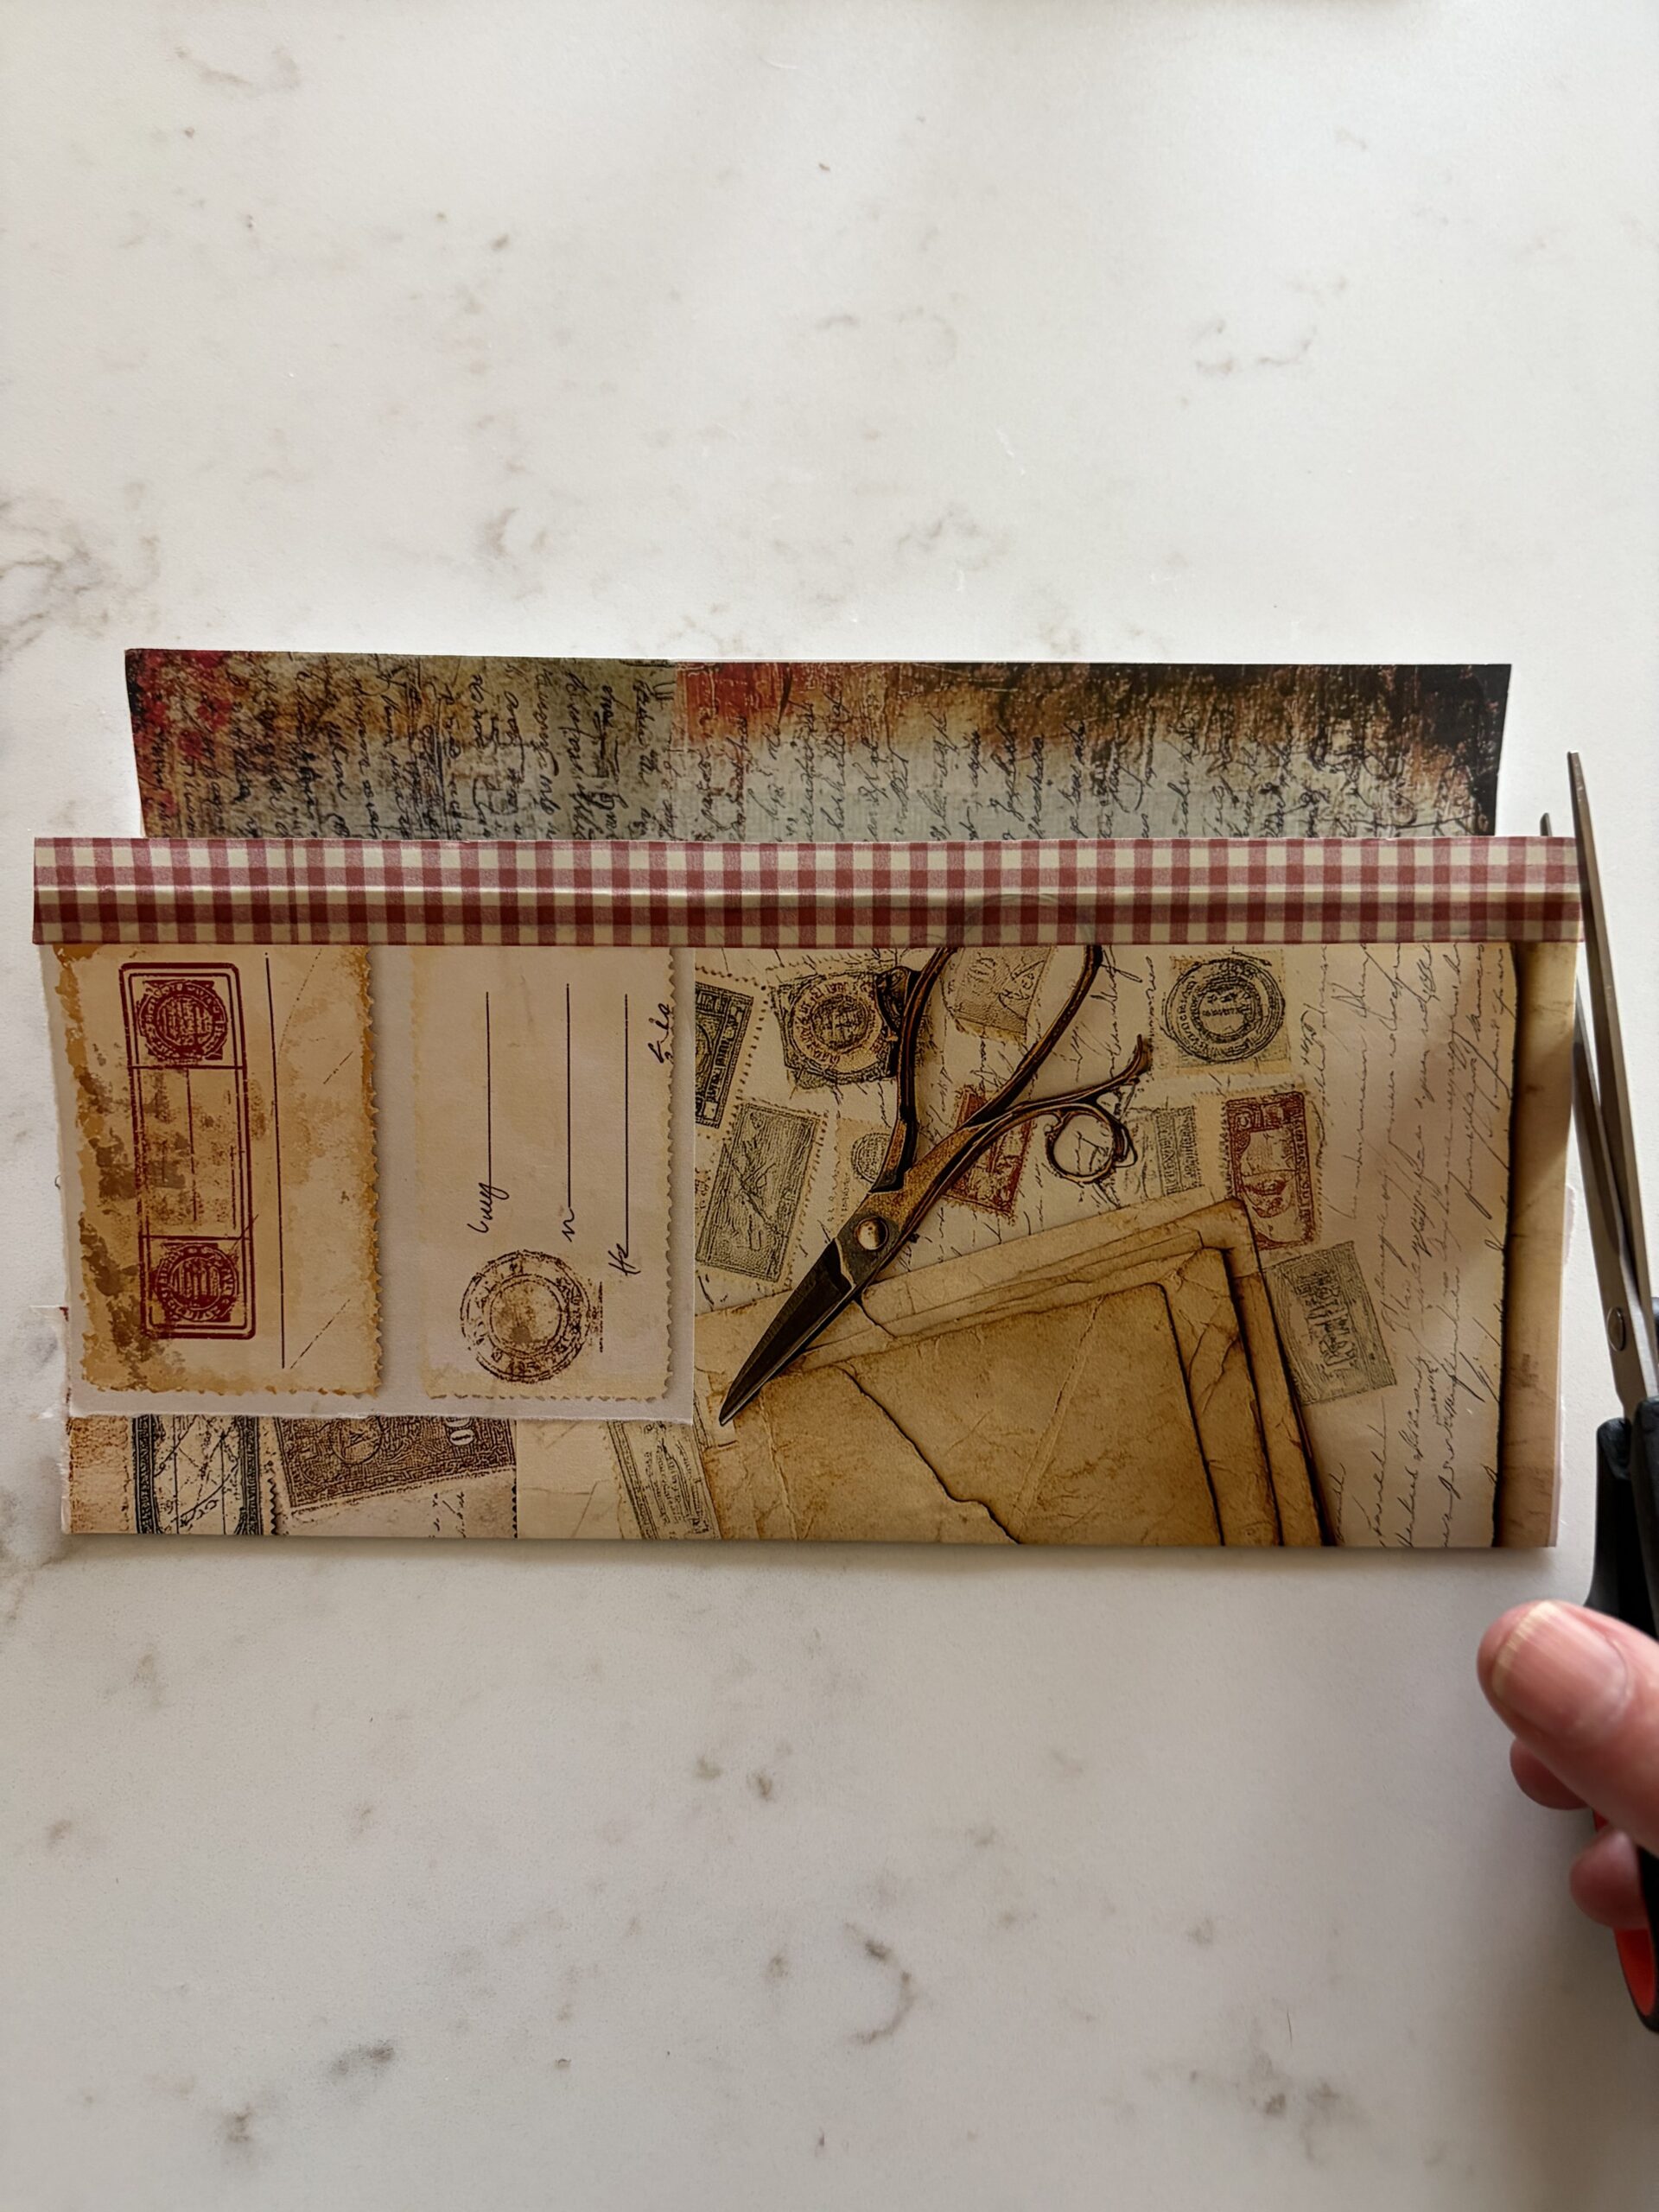
Trim down at each side if needed and fold over the top.
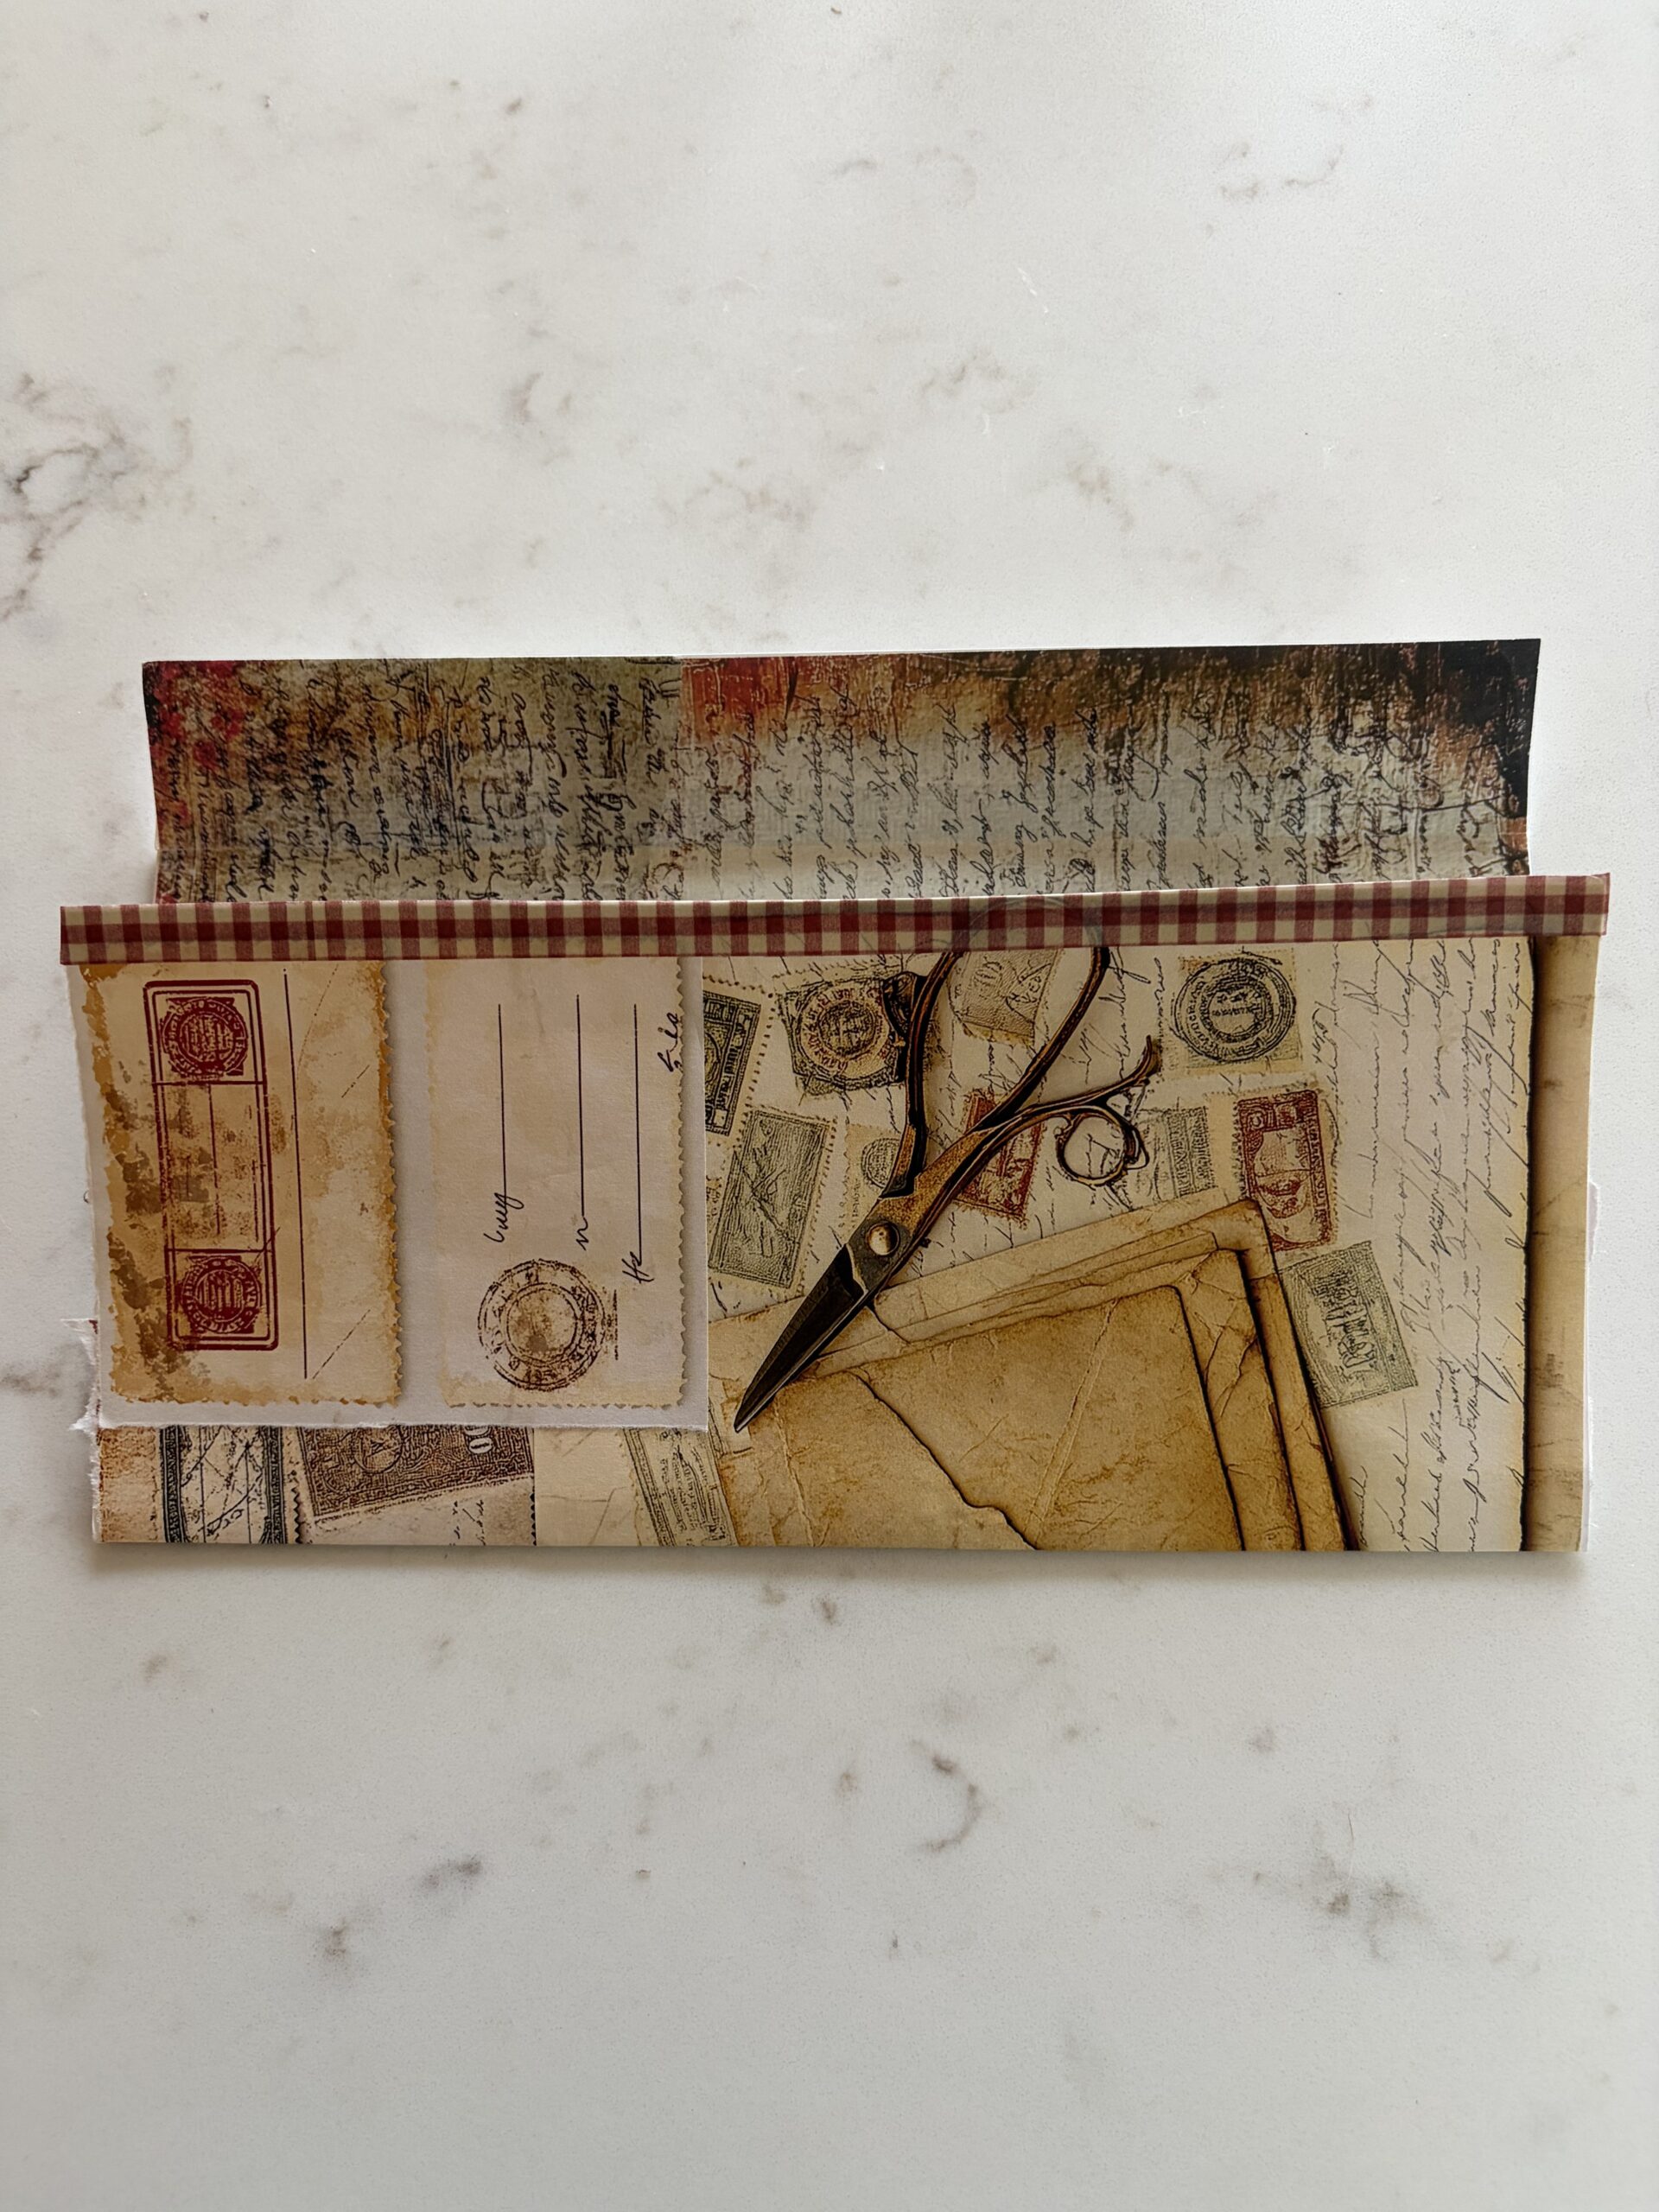
Finished top washi tape strip.
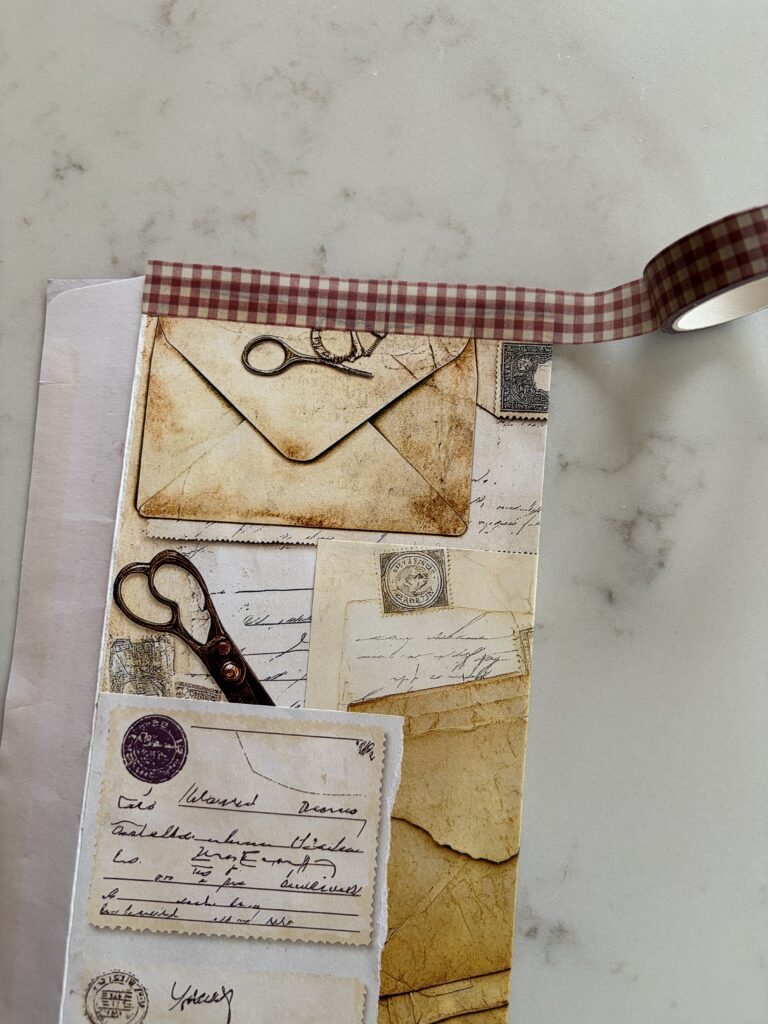
Add washi to each of the sides to seal them back up.
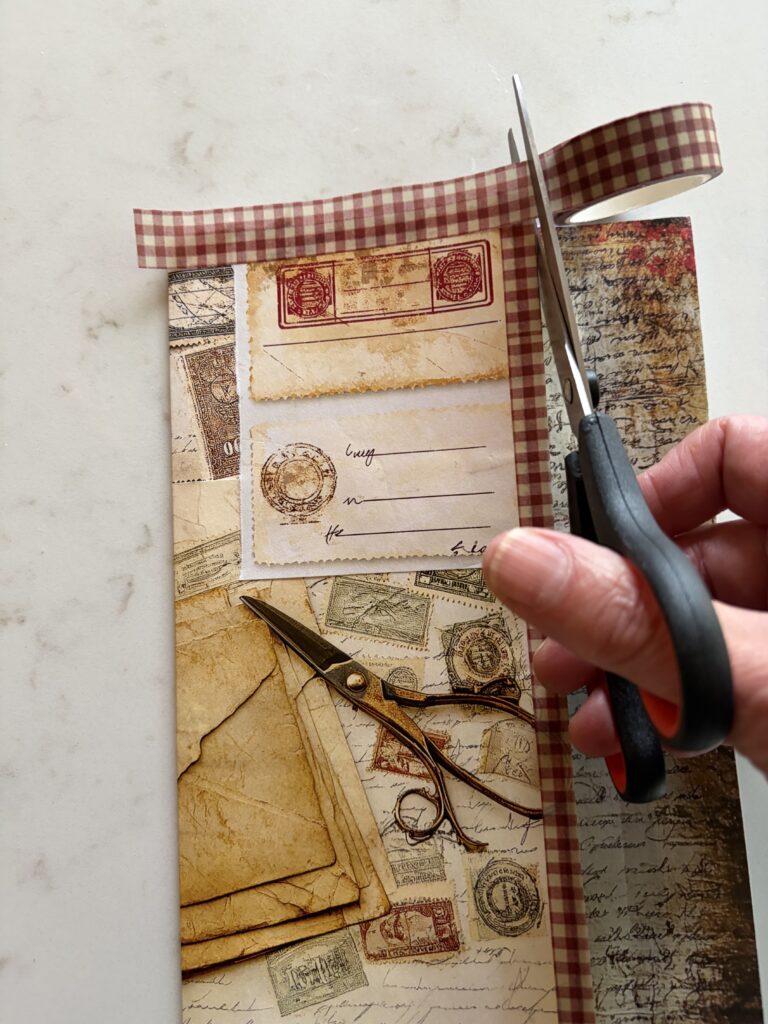
Trim ends as needed and fold the tape over to the other side.
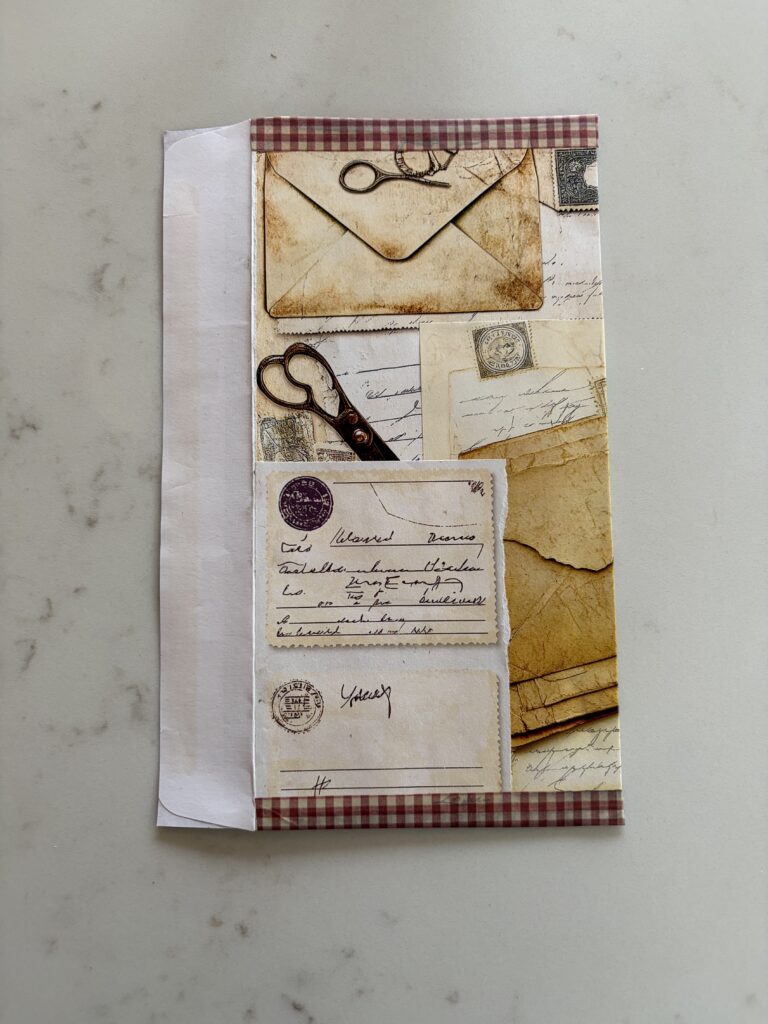
Finished washi sealing both edges of the envelope.
Below the images show what your envelope will look like by this stage front and back (I made two envelopes – one to sit either edge of a double page spread inside my junk journal):
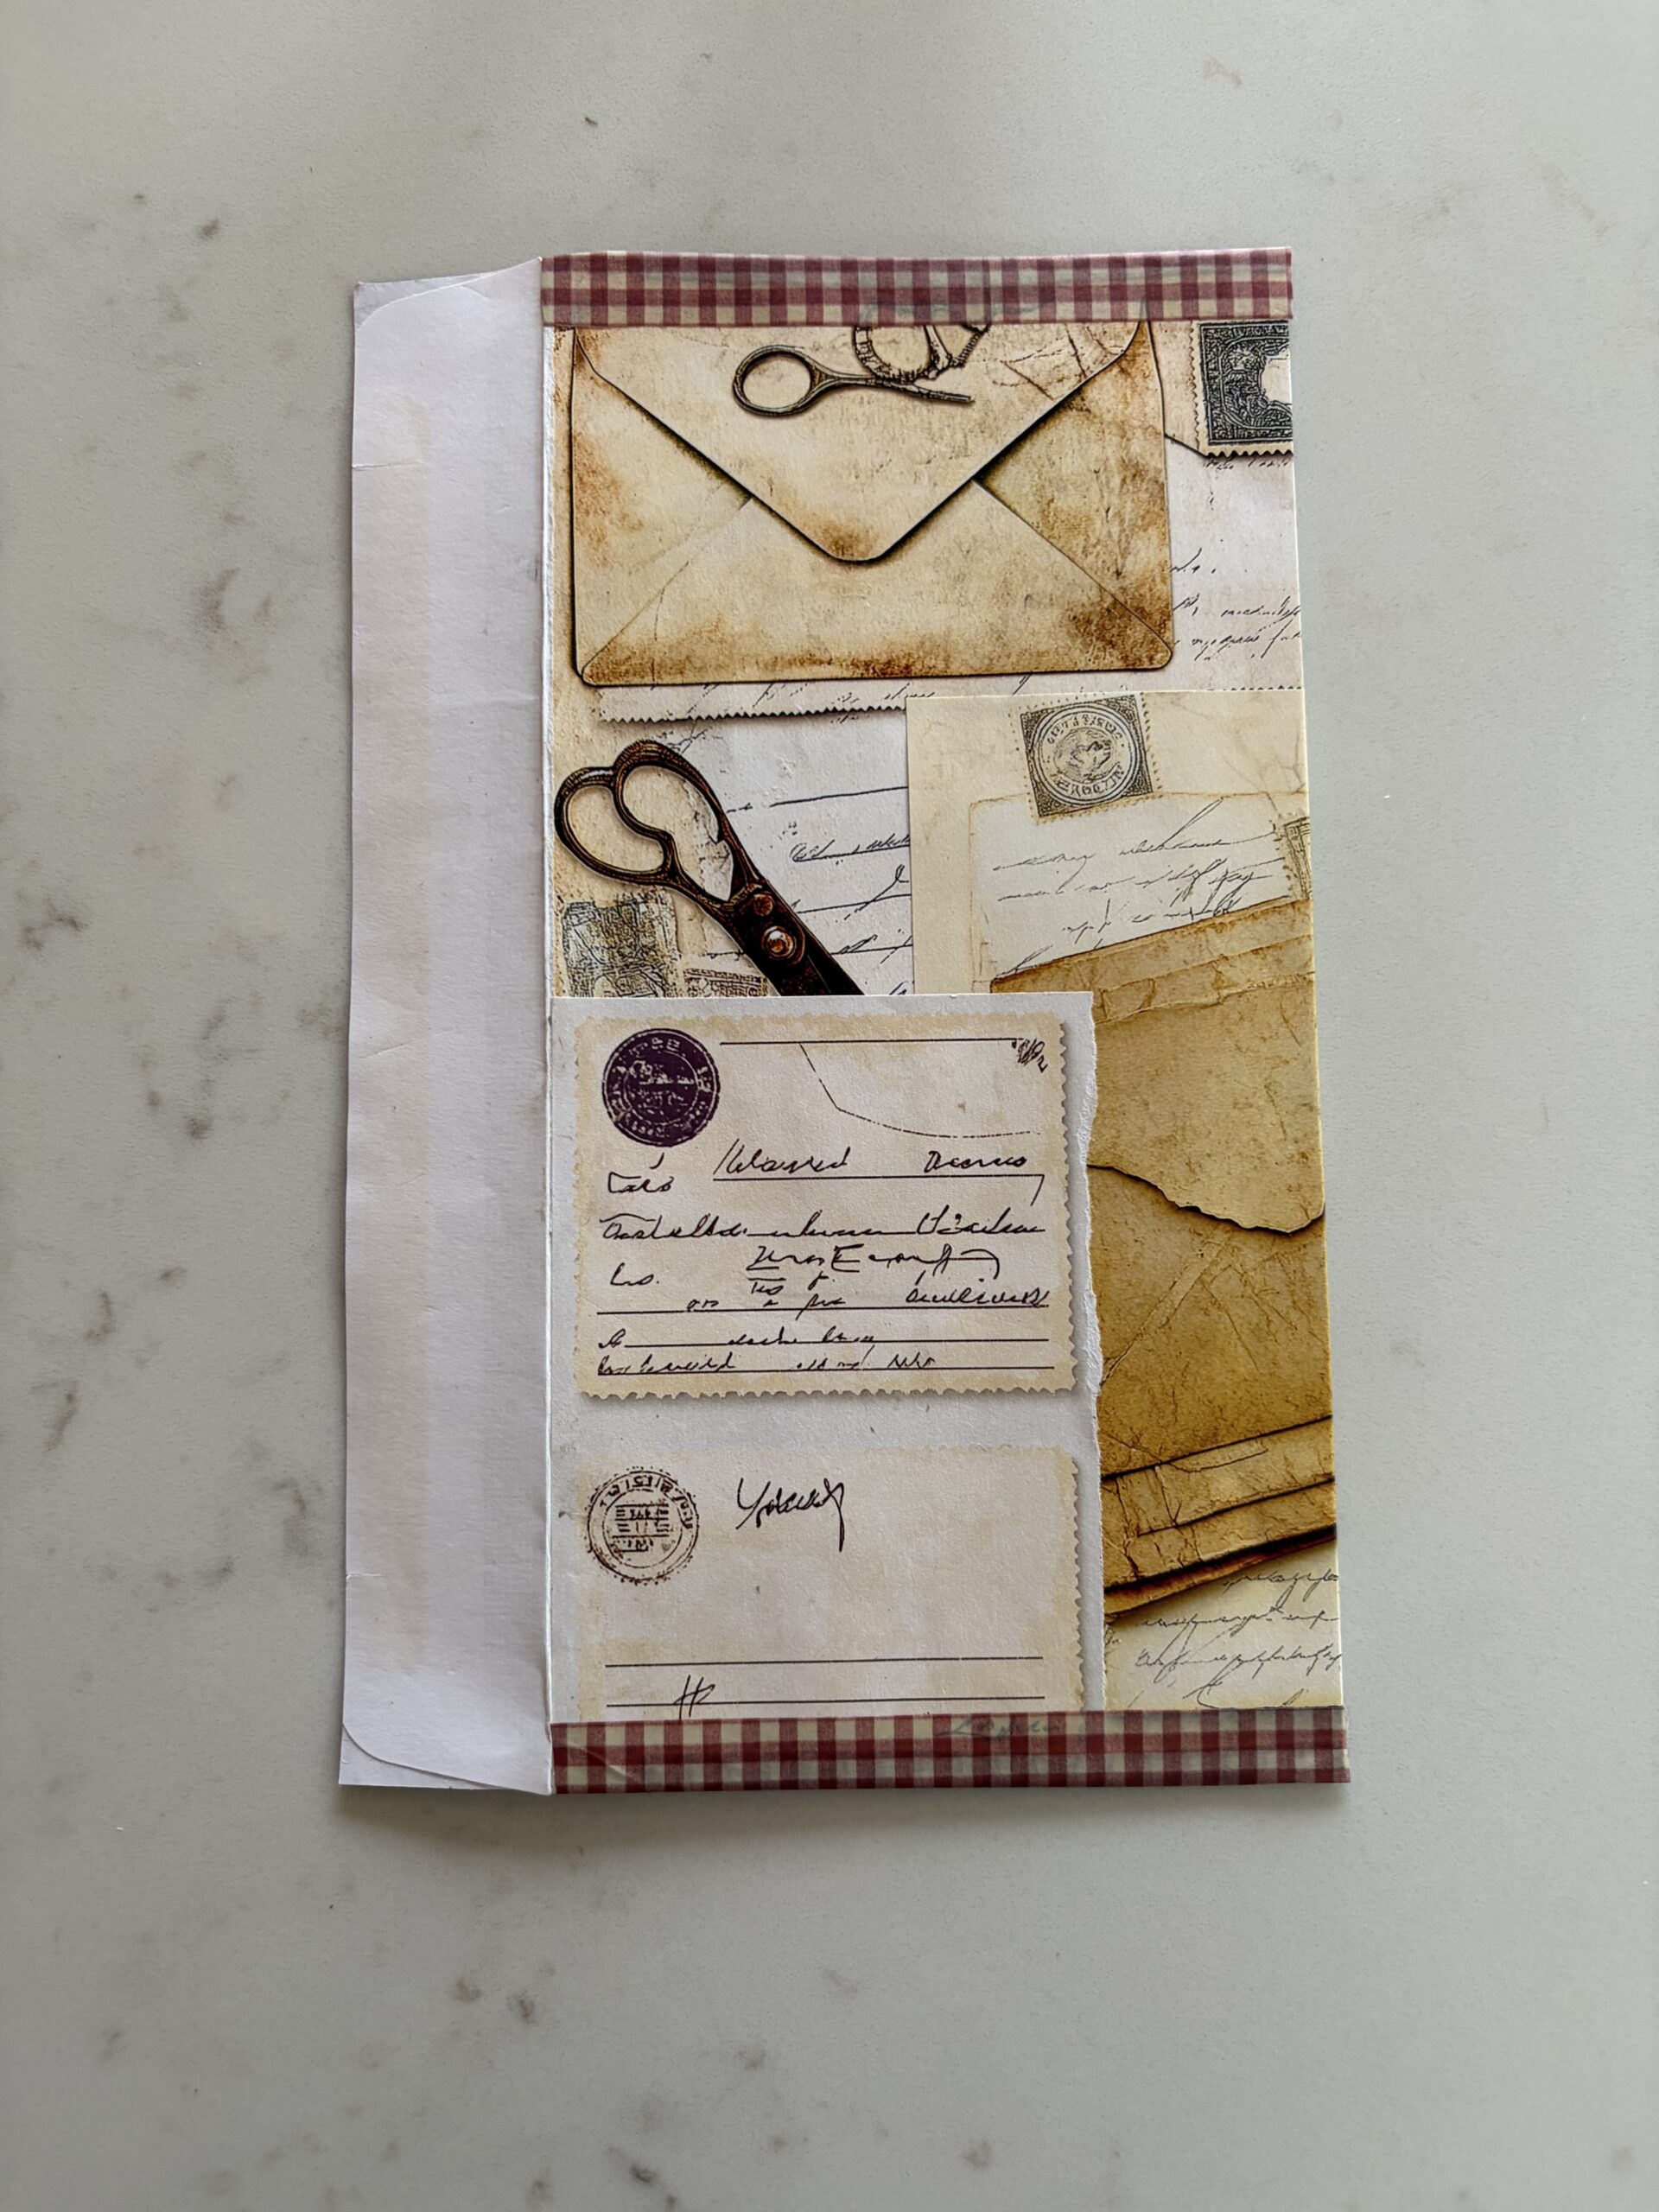
Back of envelope – the white tab will stick to the page.
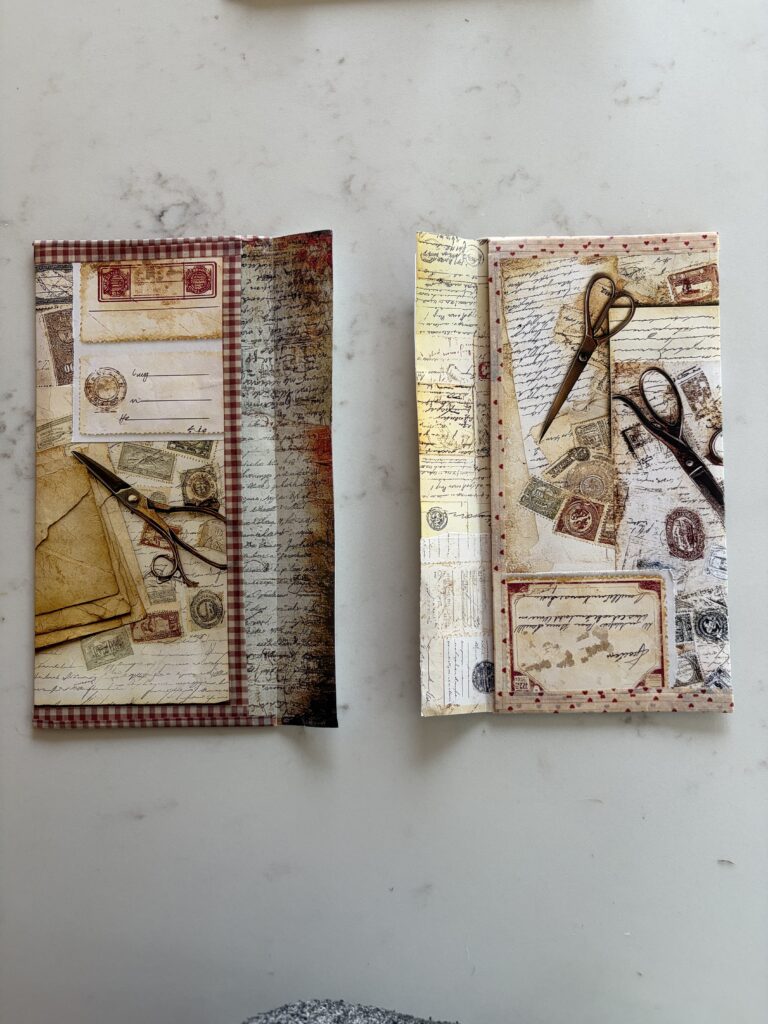
Front of envelope – this is the side that has the pocket to put things in.
STEP 7: Sticking the envelope in your junk journal
I specifically wanted my envelopes to be stuck into my Life Junk Journal on the left and right edges of a double page spread.
The point of ONLY sticking the top white tab of the envelope into the journal means that the envelopes can then be opened out to what looks like a four page spread (an image below will show you this – bear with!).
So take your envelope, add glue to the remaining white strip of the envelope and stick that white strip down to the edge of your junk journal page (if that’s the way you want your spread to look and work).
Of course you can stick your envelope down anywhere on your spread – dependent on the size of the envelope you use, left and right edge was the finished look I wanted in my own spread.
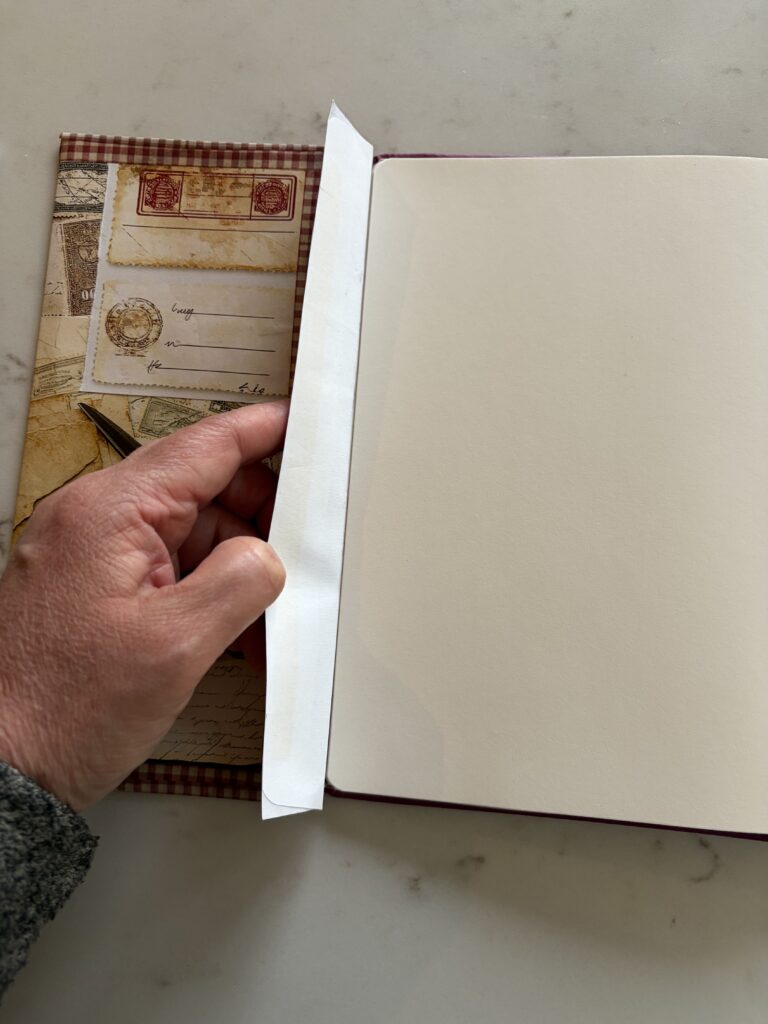
Sticking the white part of the envelope down along the left edge of the A5 Life Junk Journal.
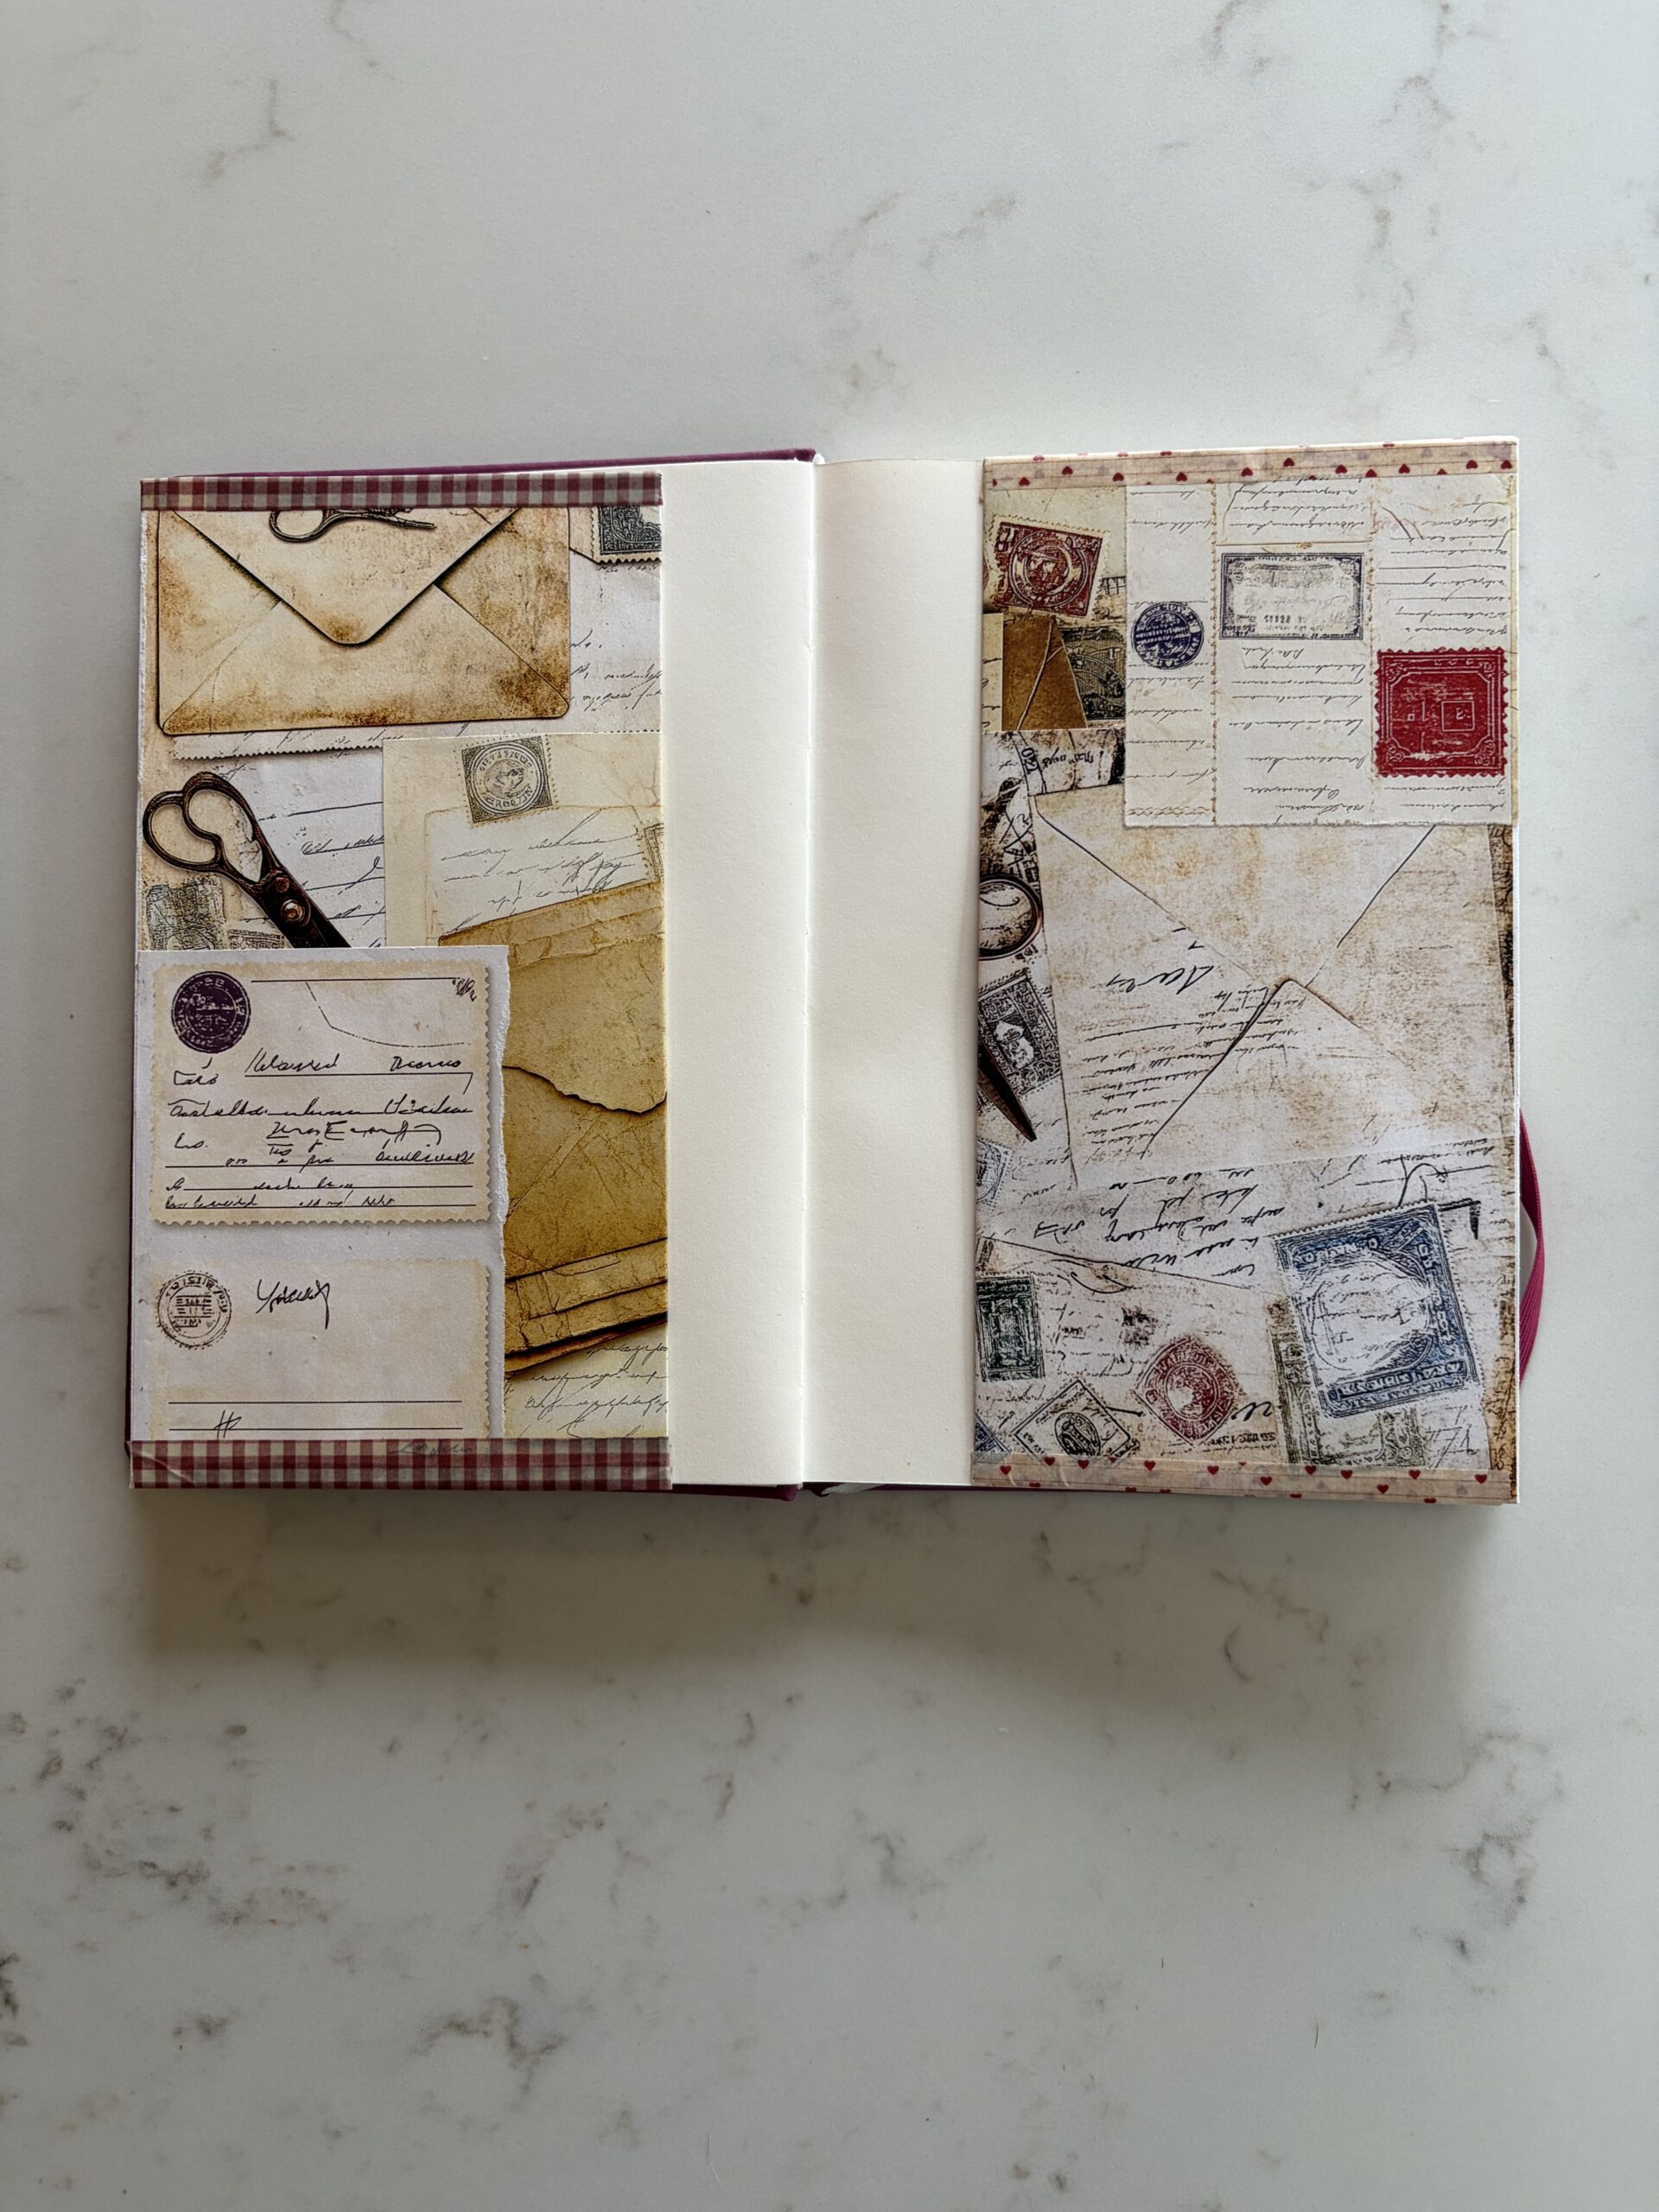
You can see the envelope on the left laying flat in the Life Junk Journal – I added another envelope to the right side too.
step 8: how the envelope works in the junk journal
You can see from the images below that the envelopes I have popped in my Life Junk Journal lay flat, but can be opened up from each side to add things inside the envelopes.
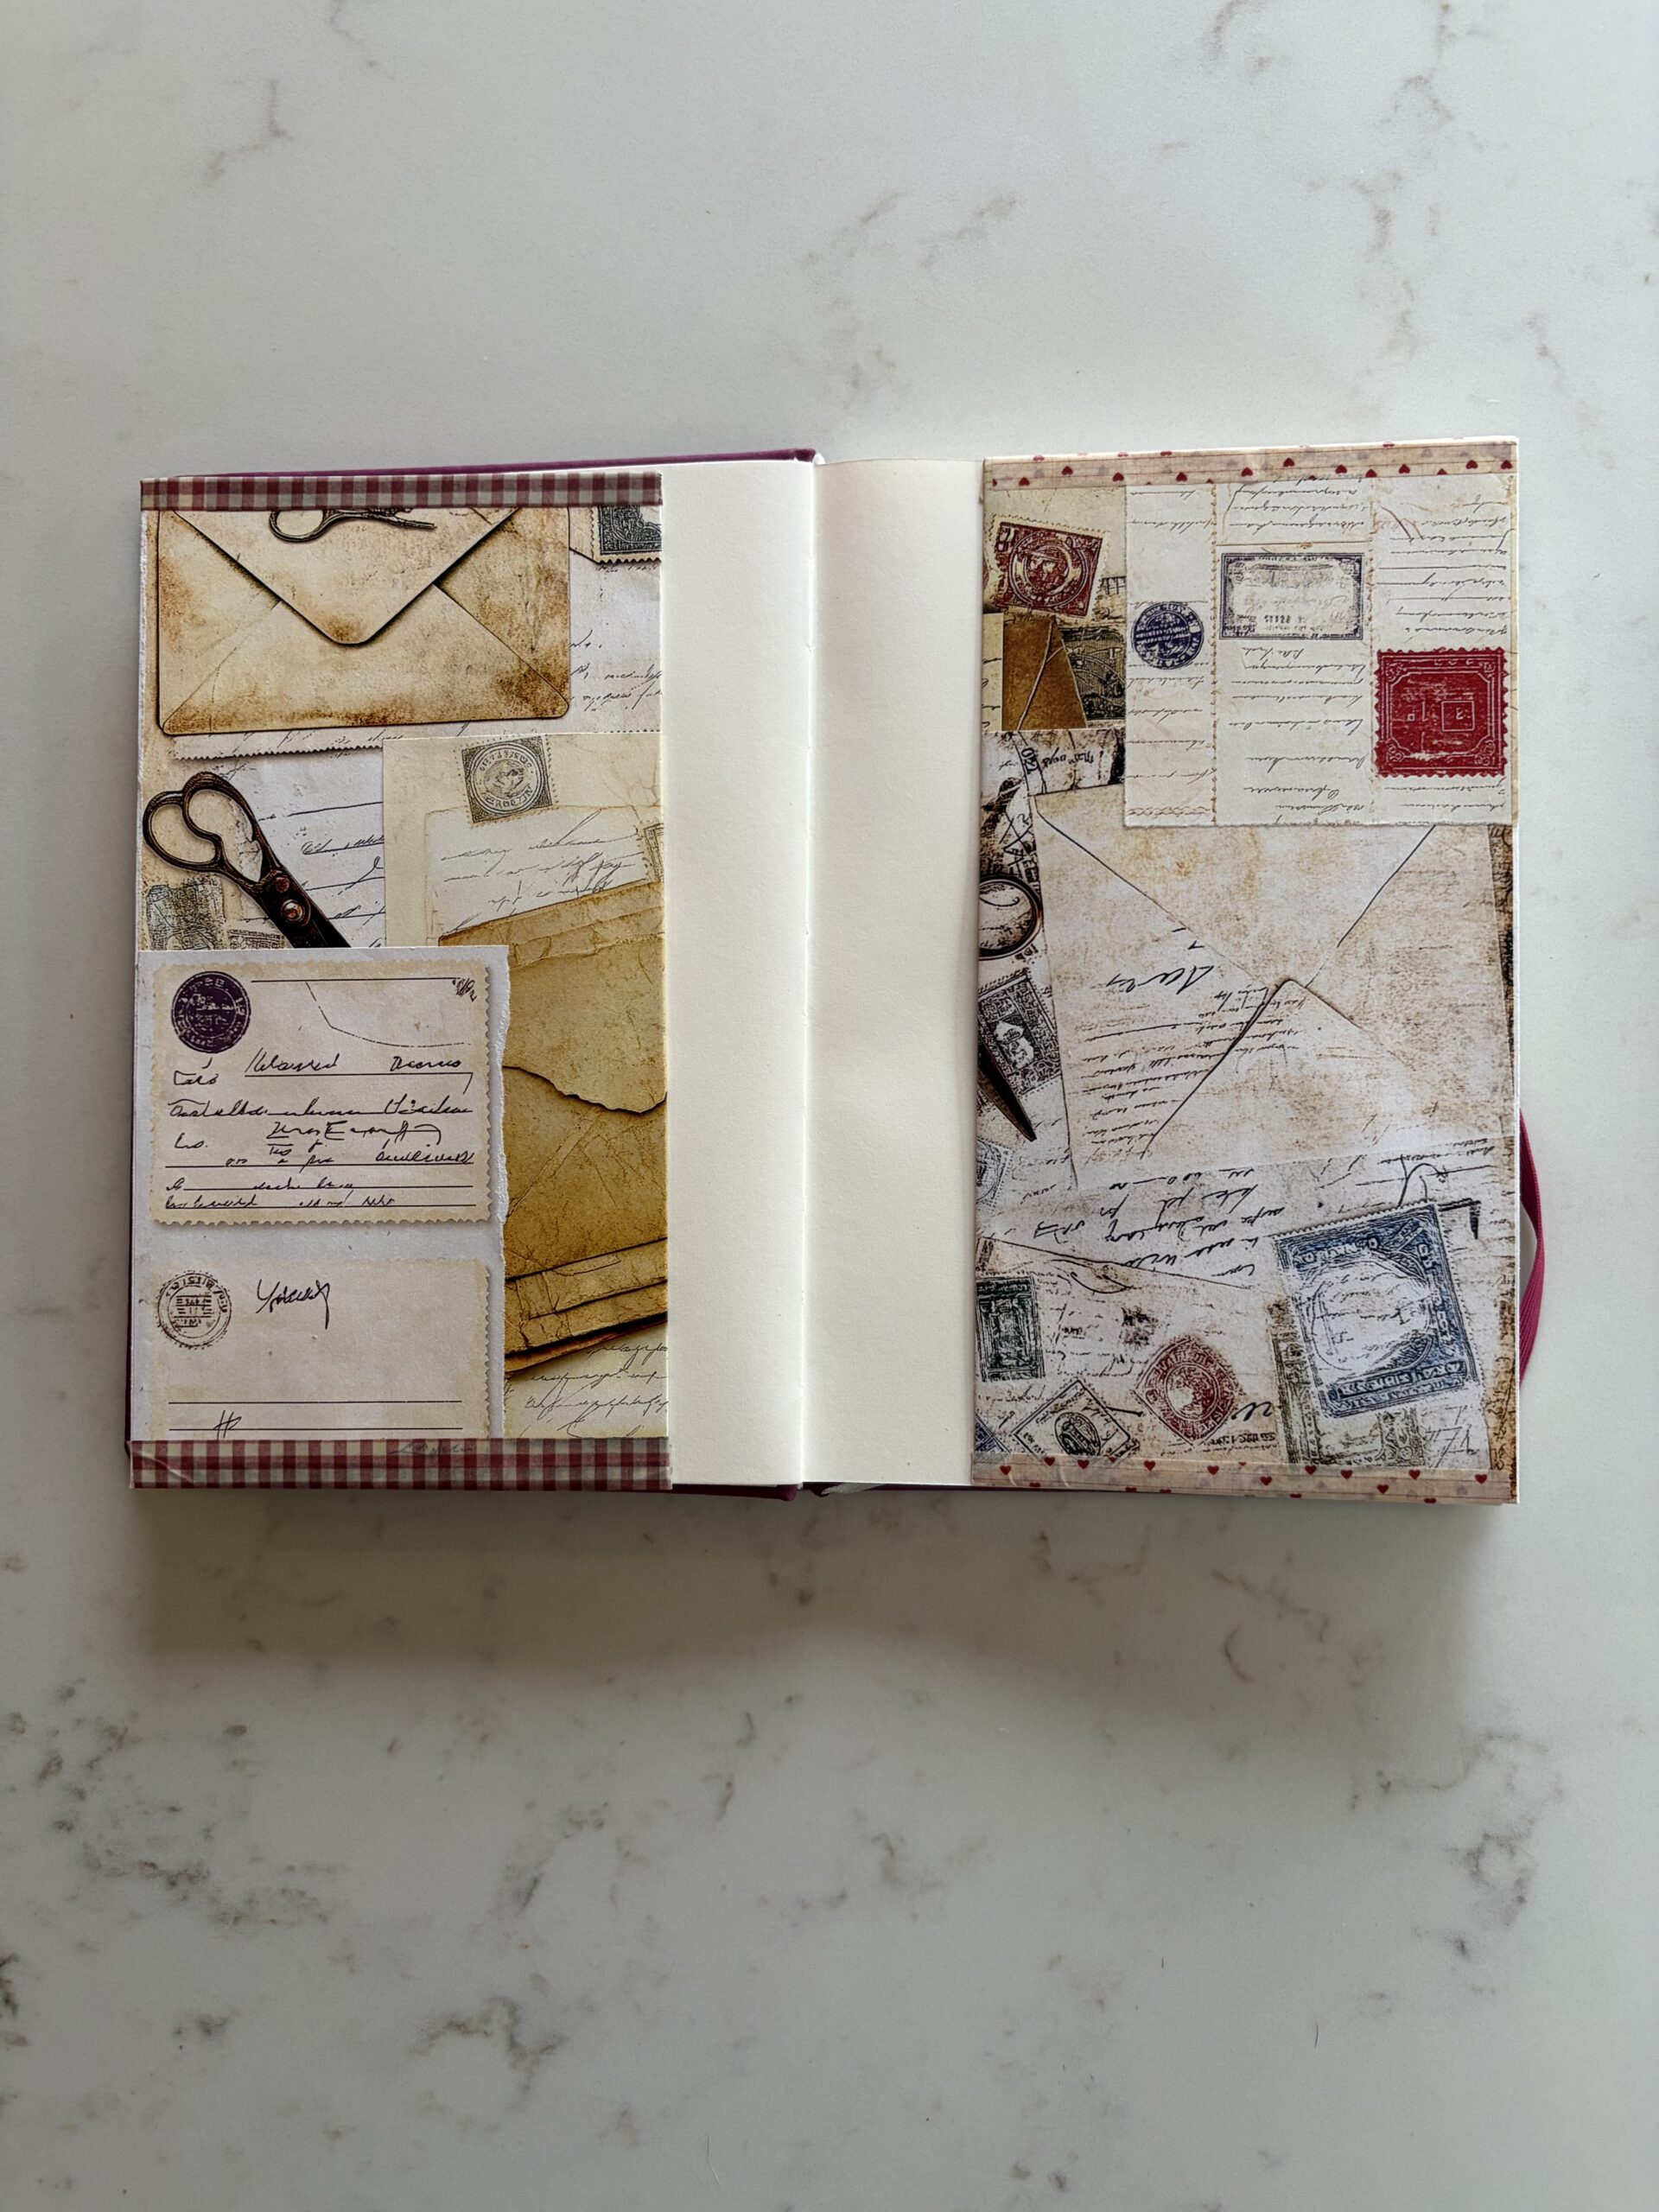
Envelopes lying flat inside the Life Junk Journal.
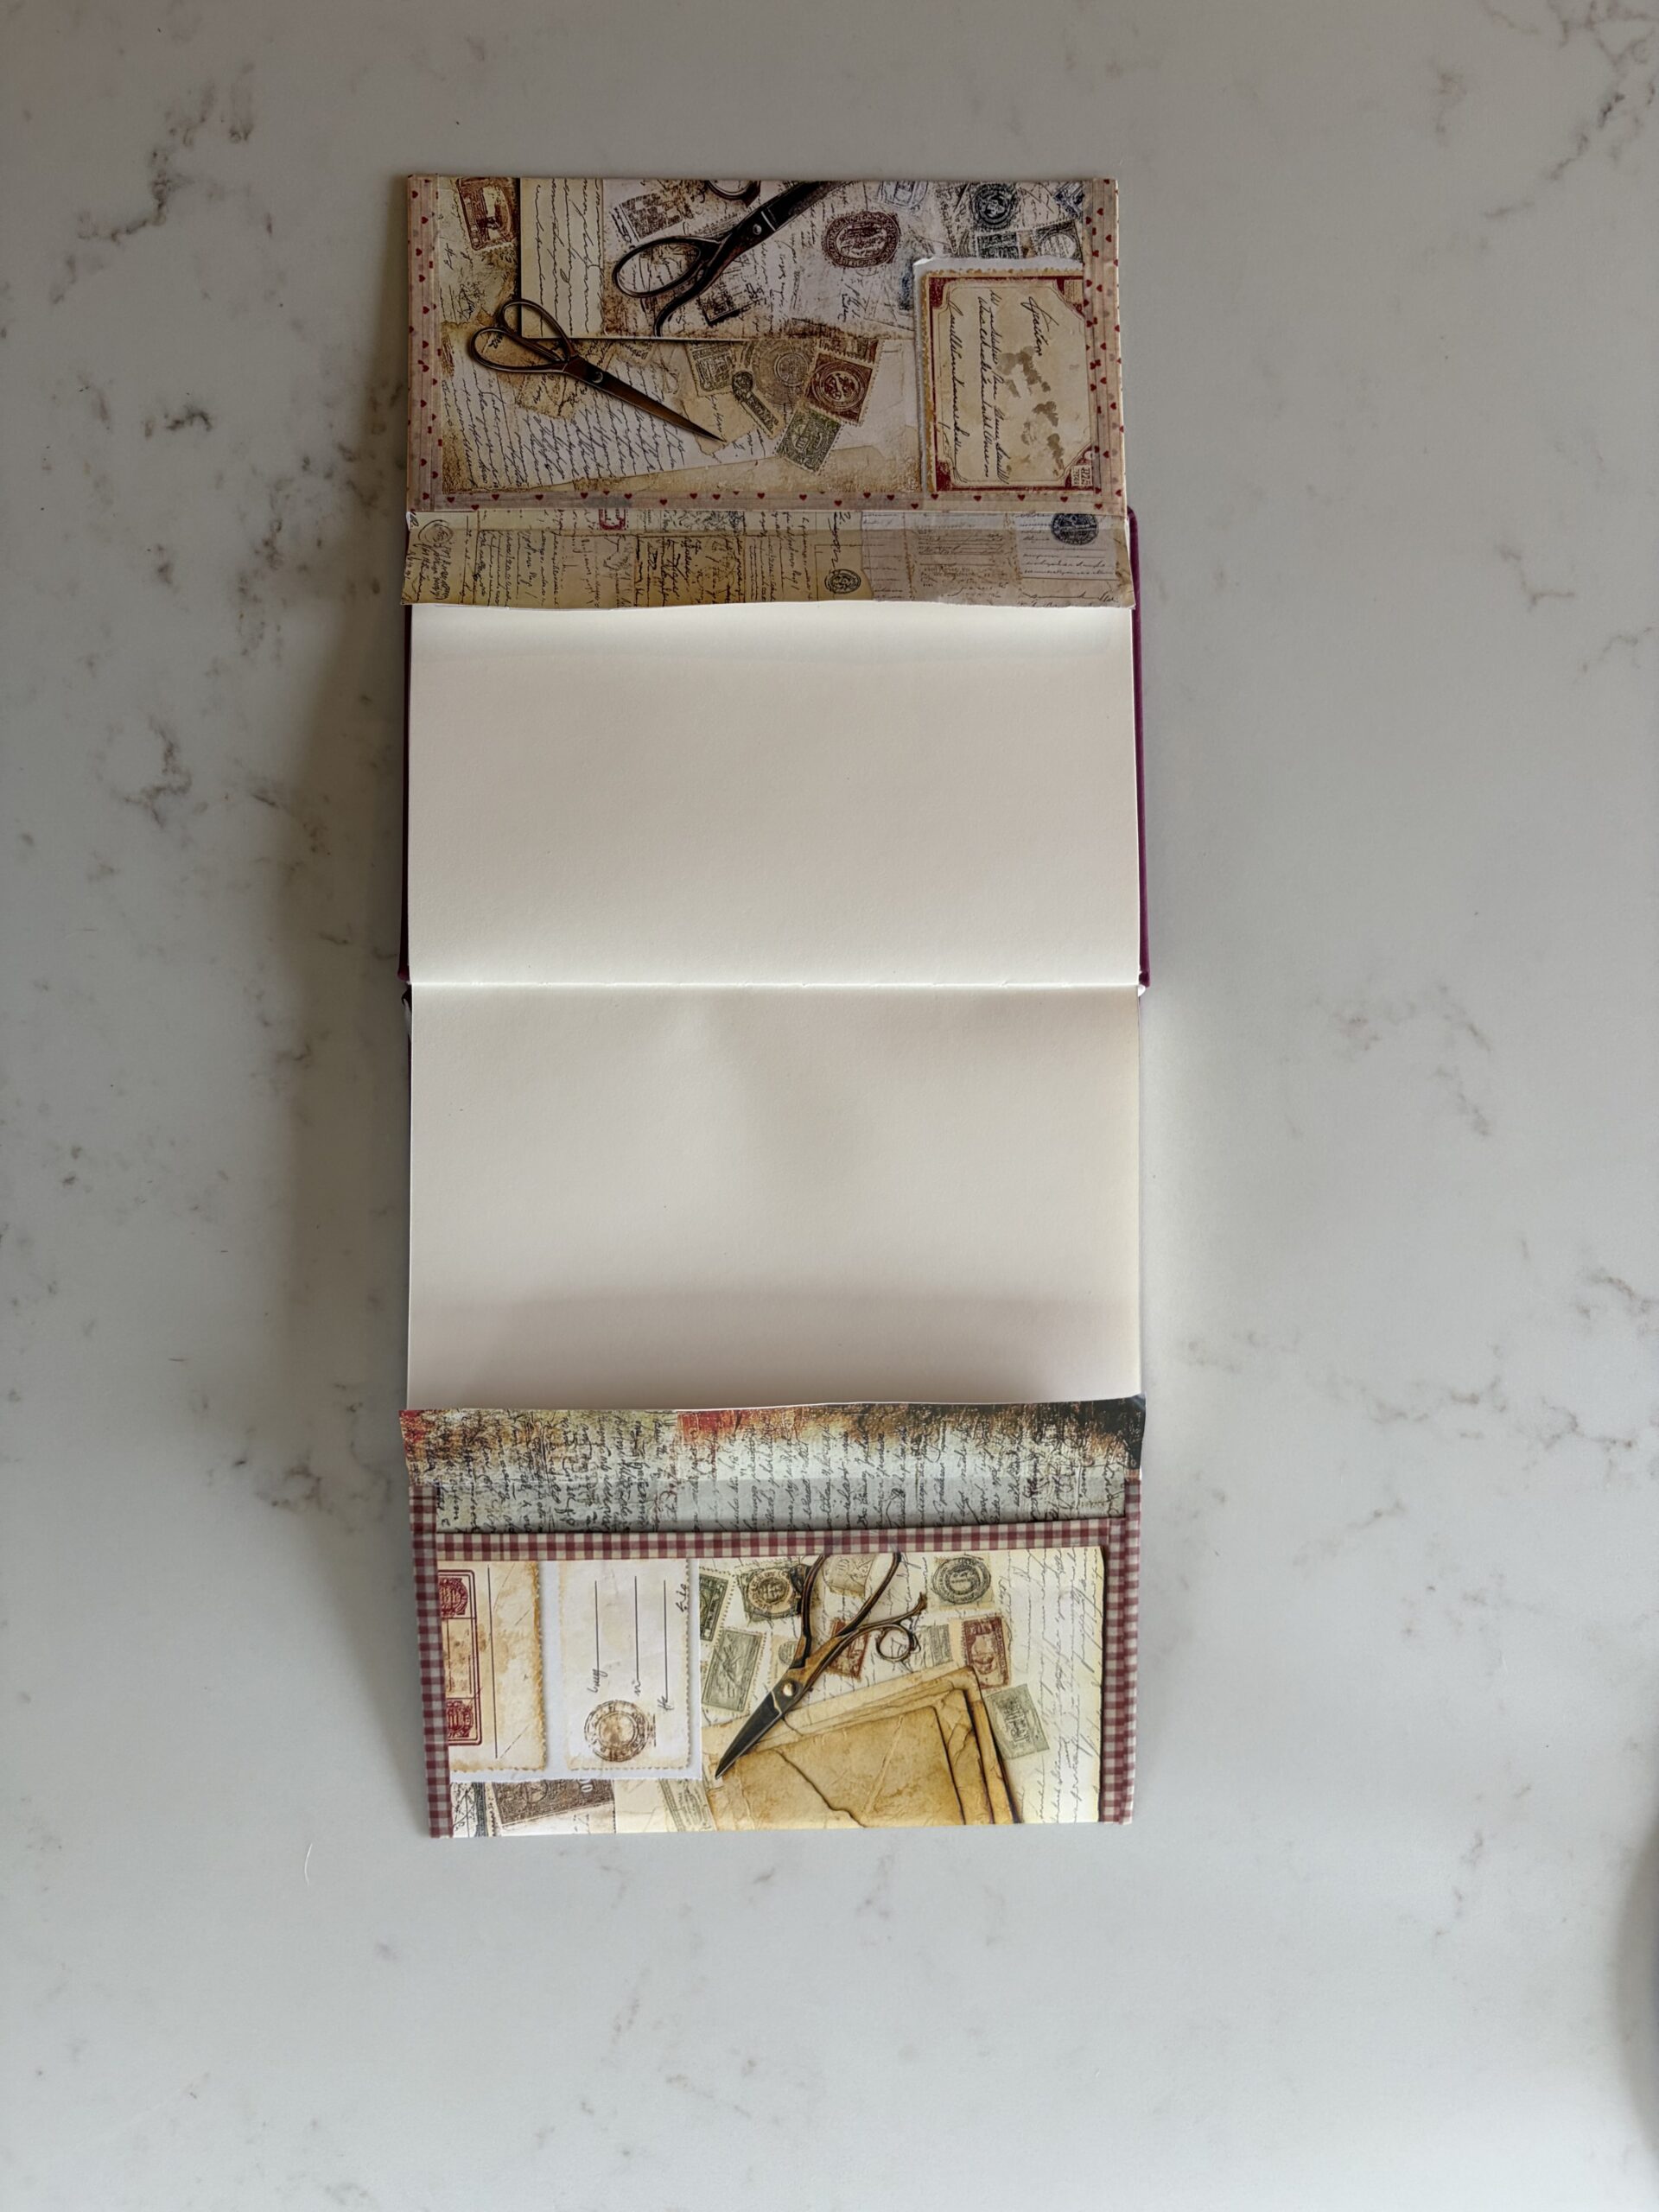
Envelopes opened up each side to be able to add things inside.
step 9: finishing the spread
Last step is to have fun creating the rest of the spread on your junk journal page(s). You can add any ephemera you wish – I’ve created a couple of these pocket spreads – you can see the end result of one of my spreads below – I went a little over the top! But I was still happy with the end result.
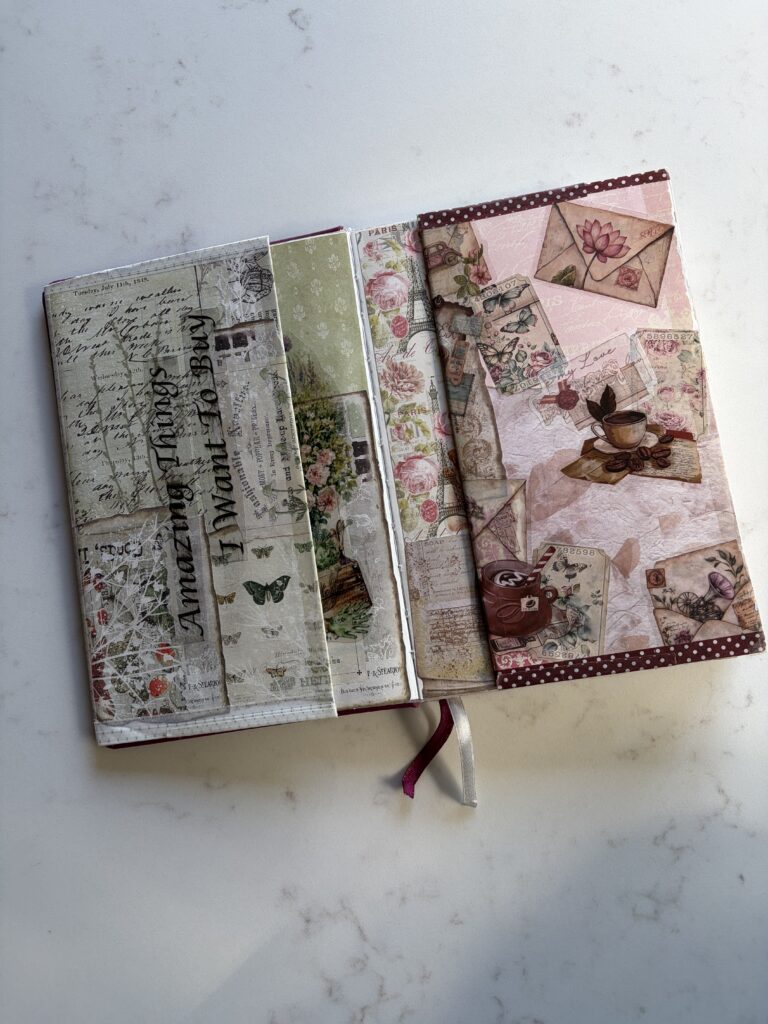
Spread with envelope pockets laid flat
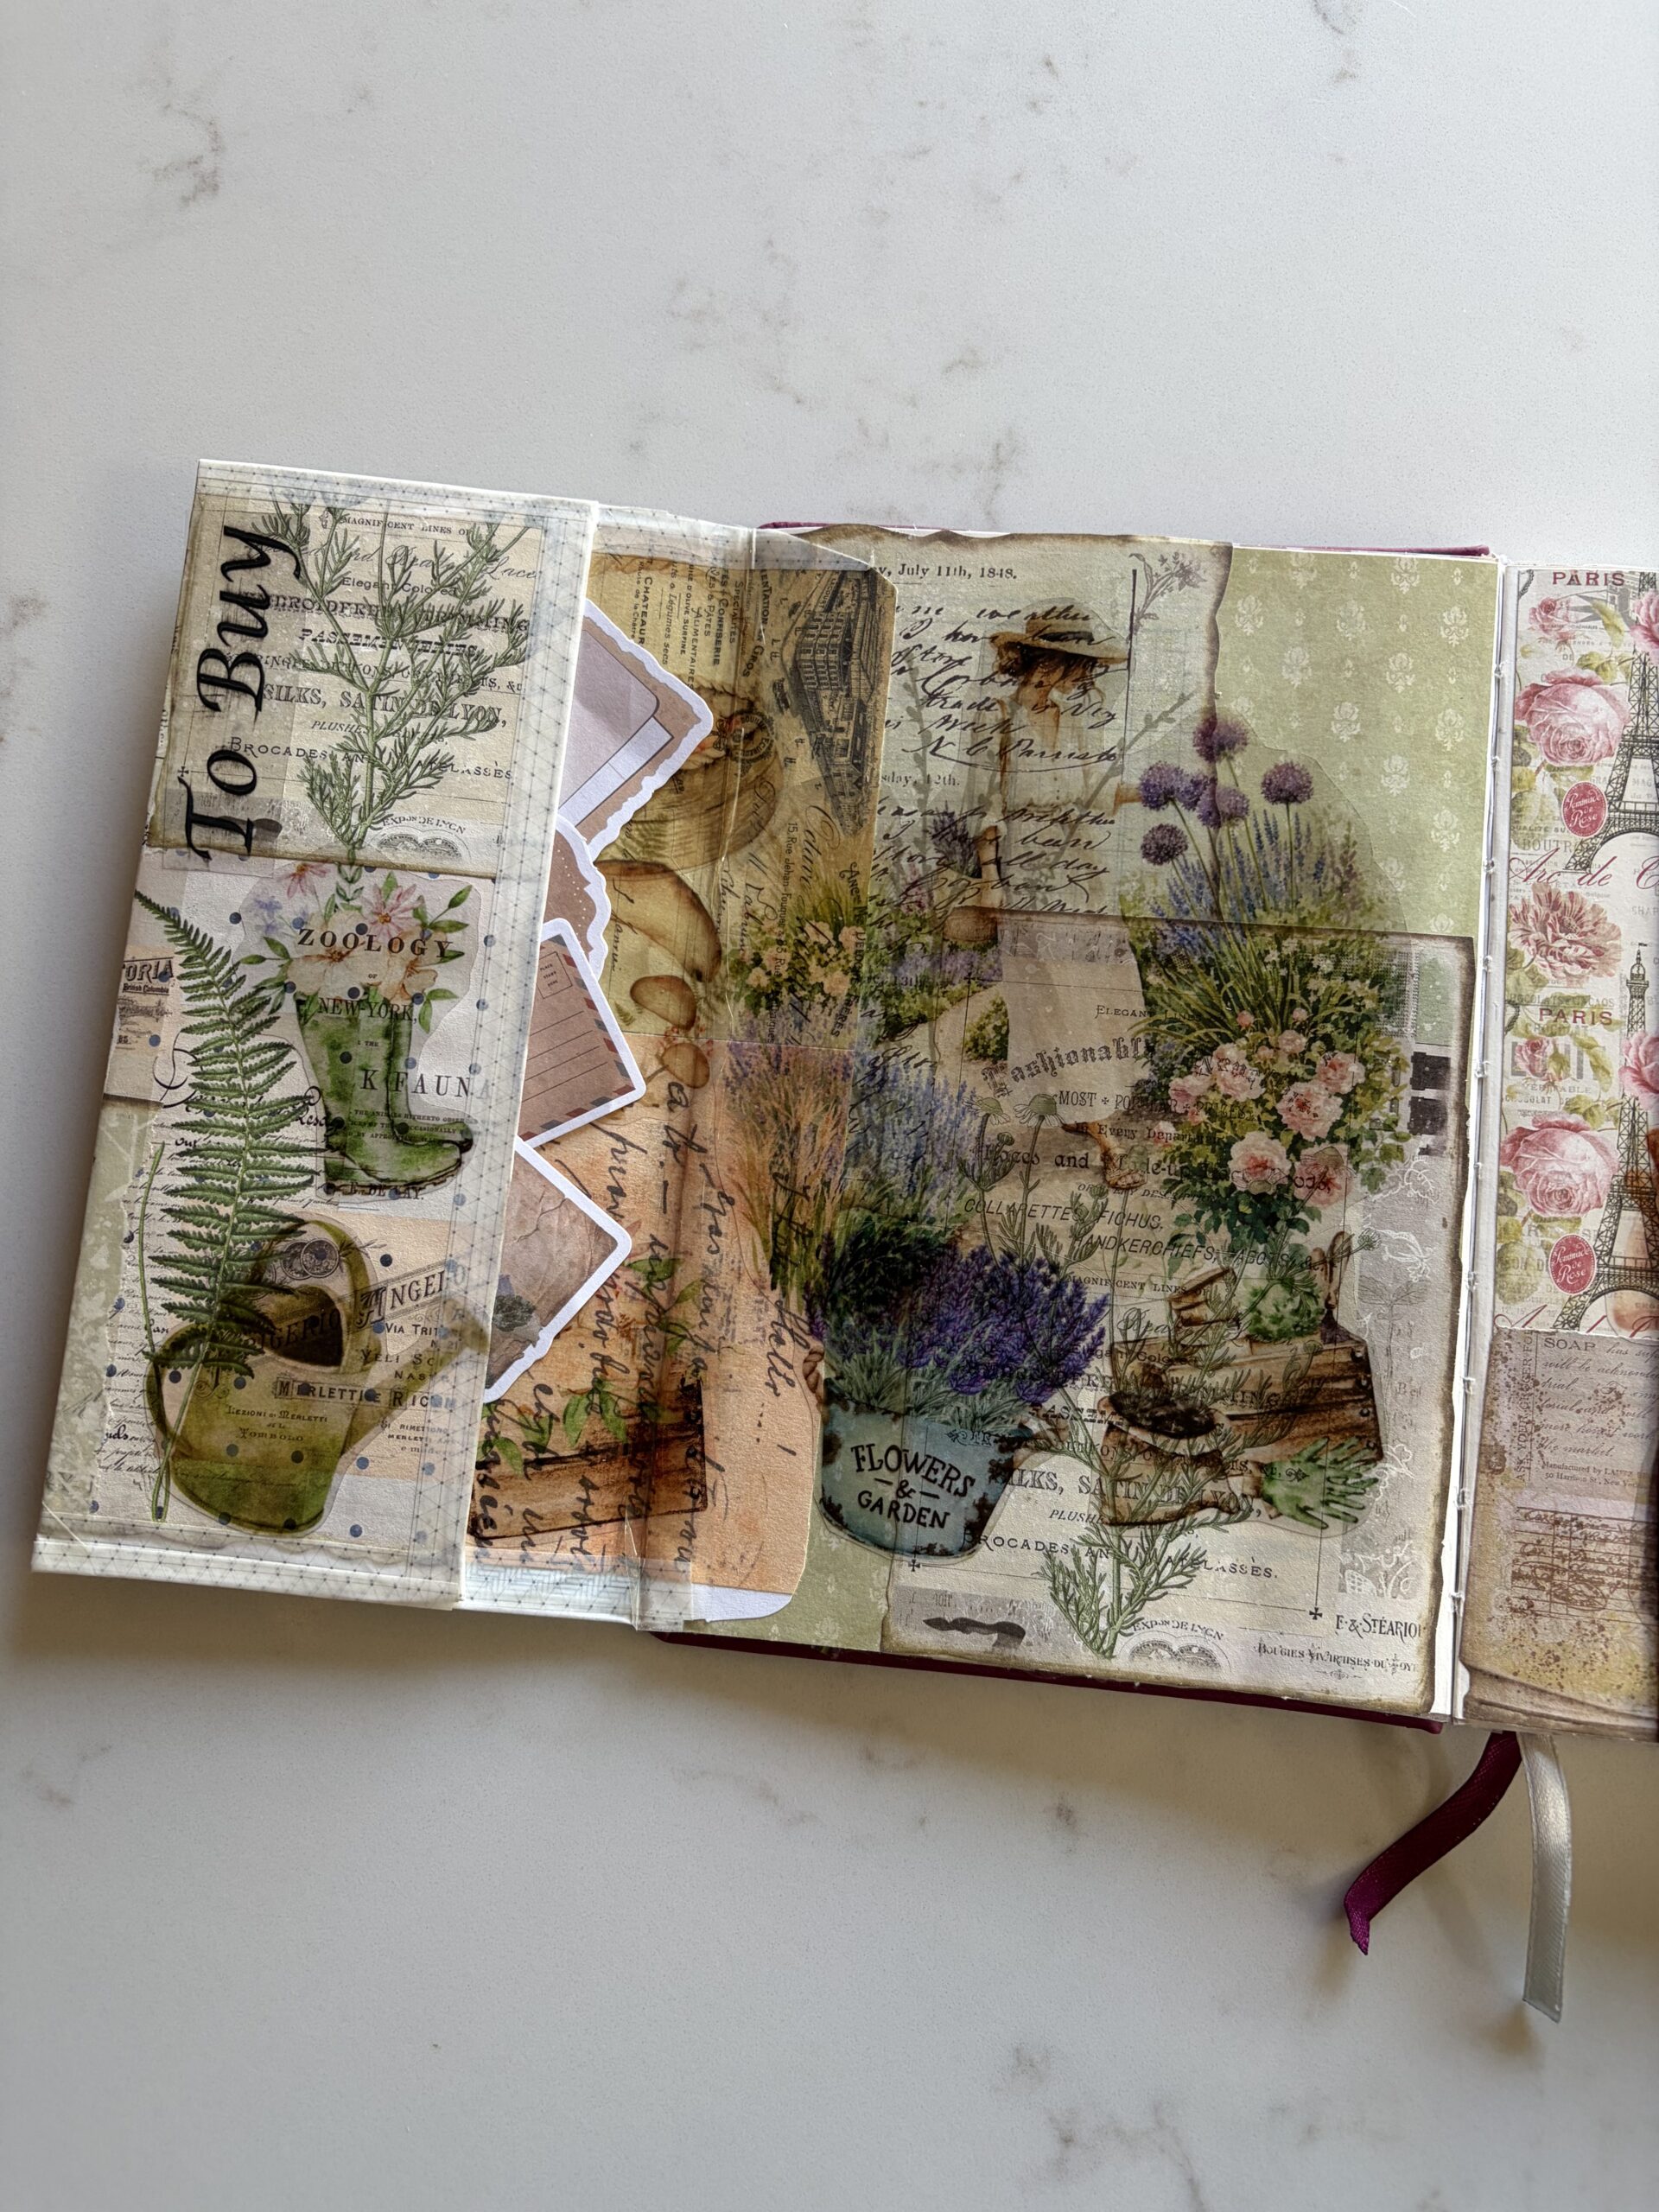
Spread showing ephemera popped inside pocket left side
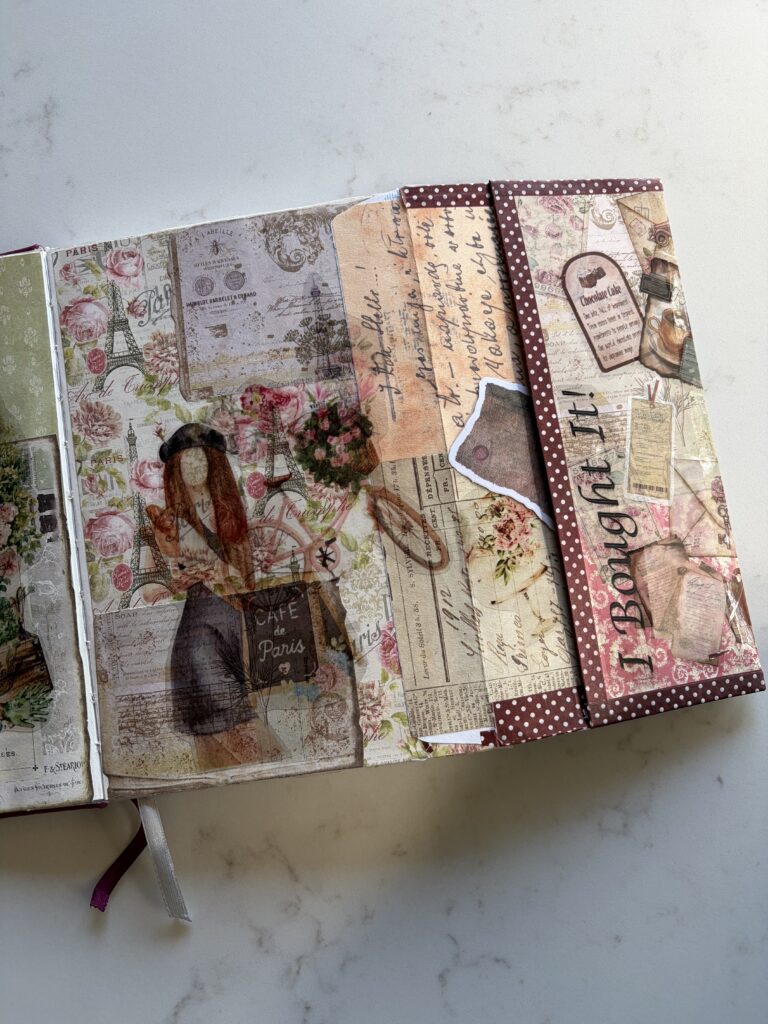
Spread showing ephemera popped inside pocket right side
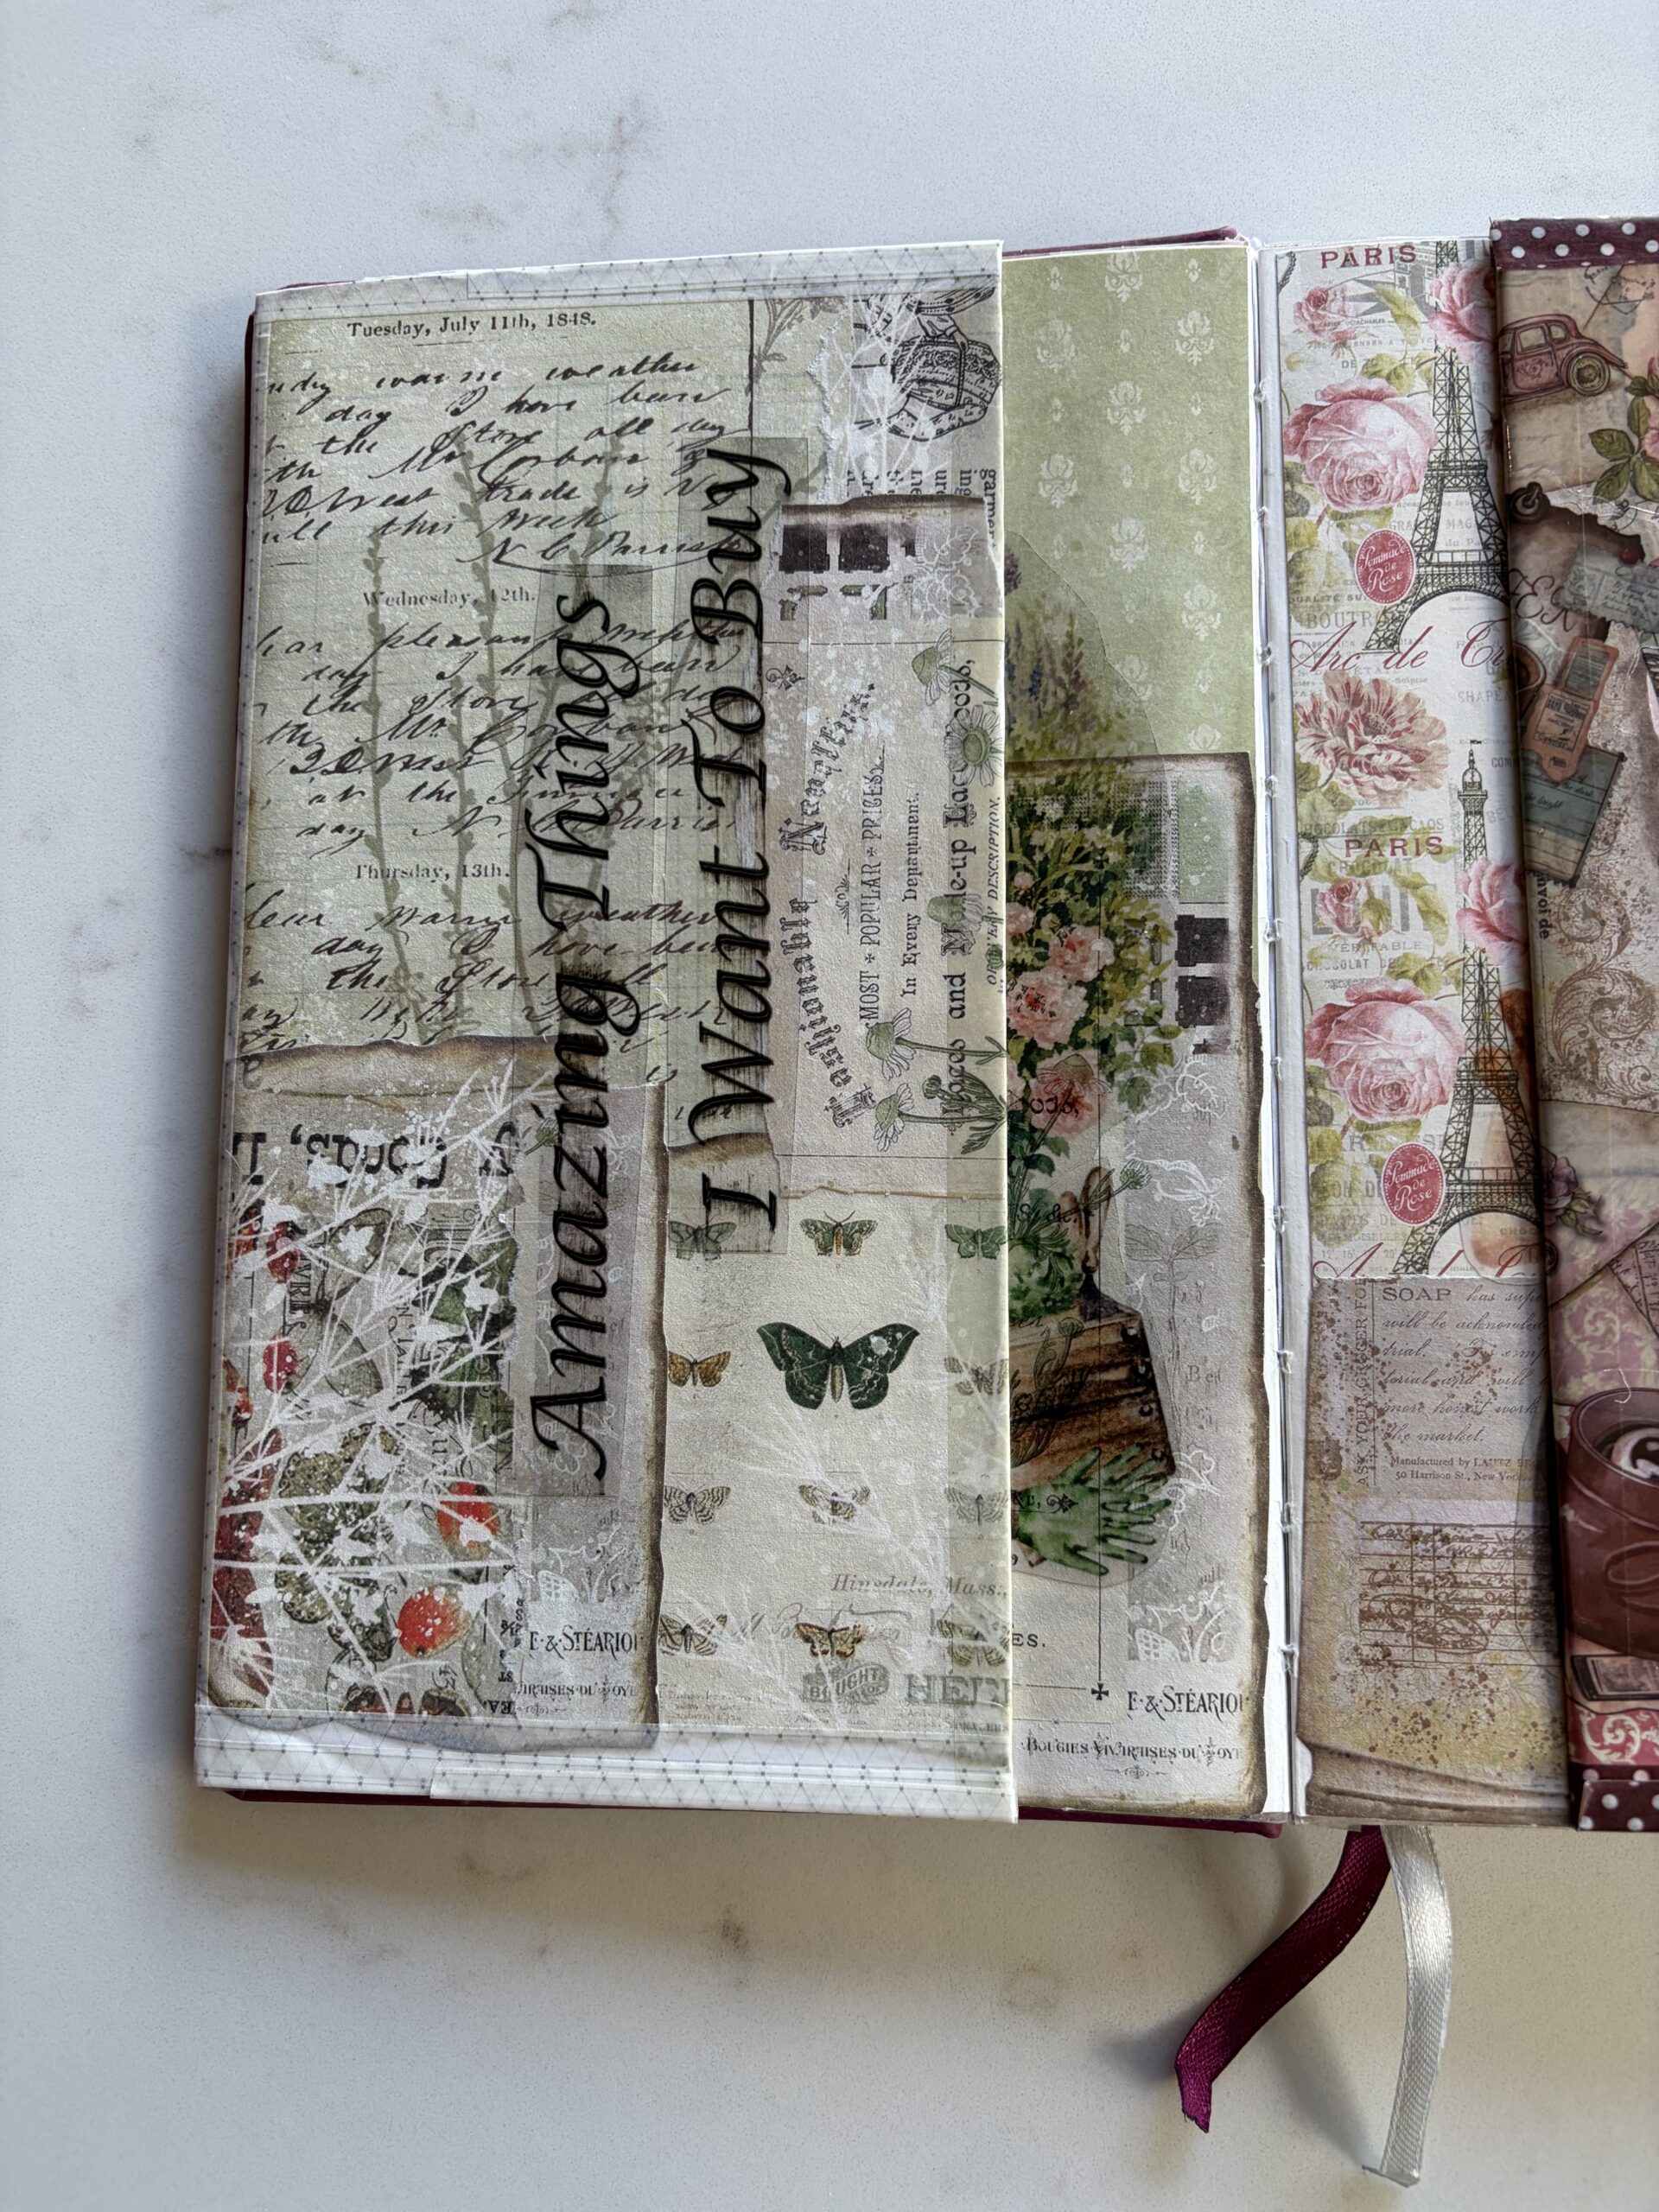
Text added to the pocket – amazing things I want to buy.
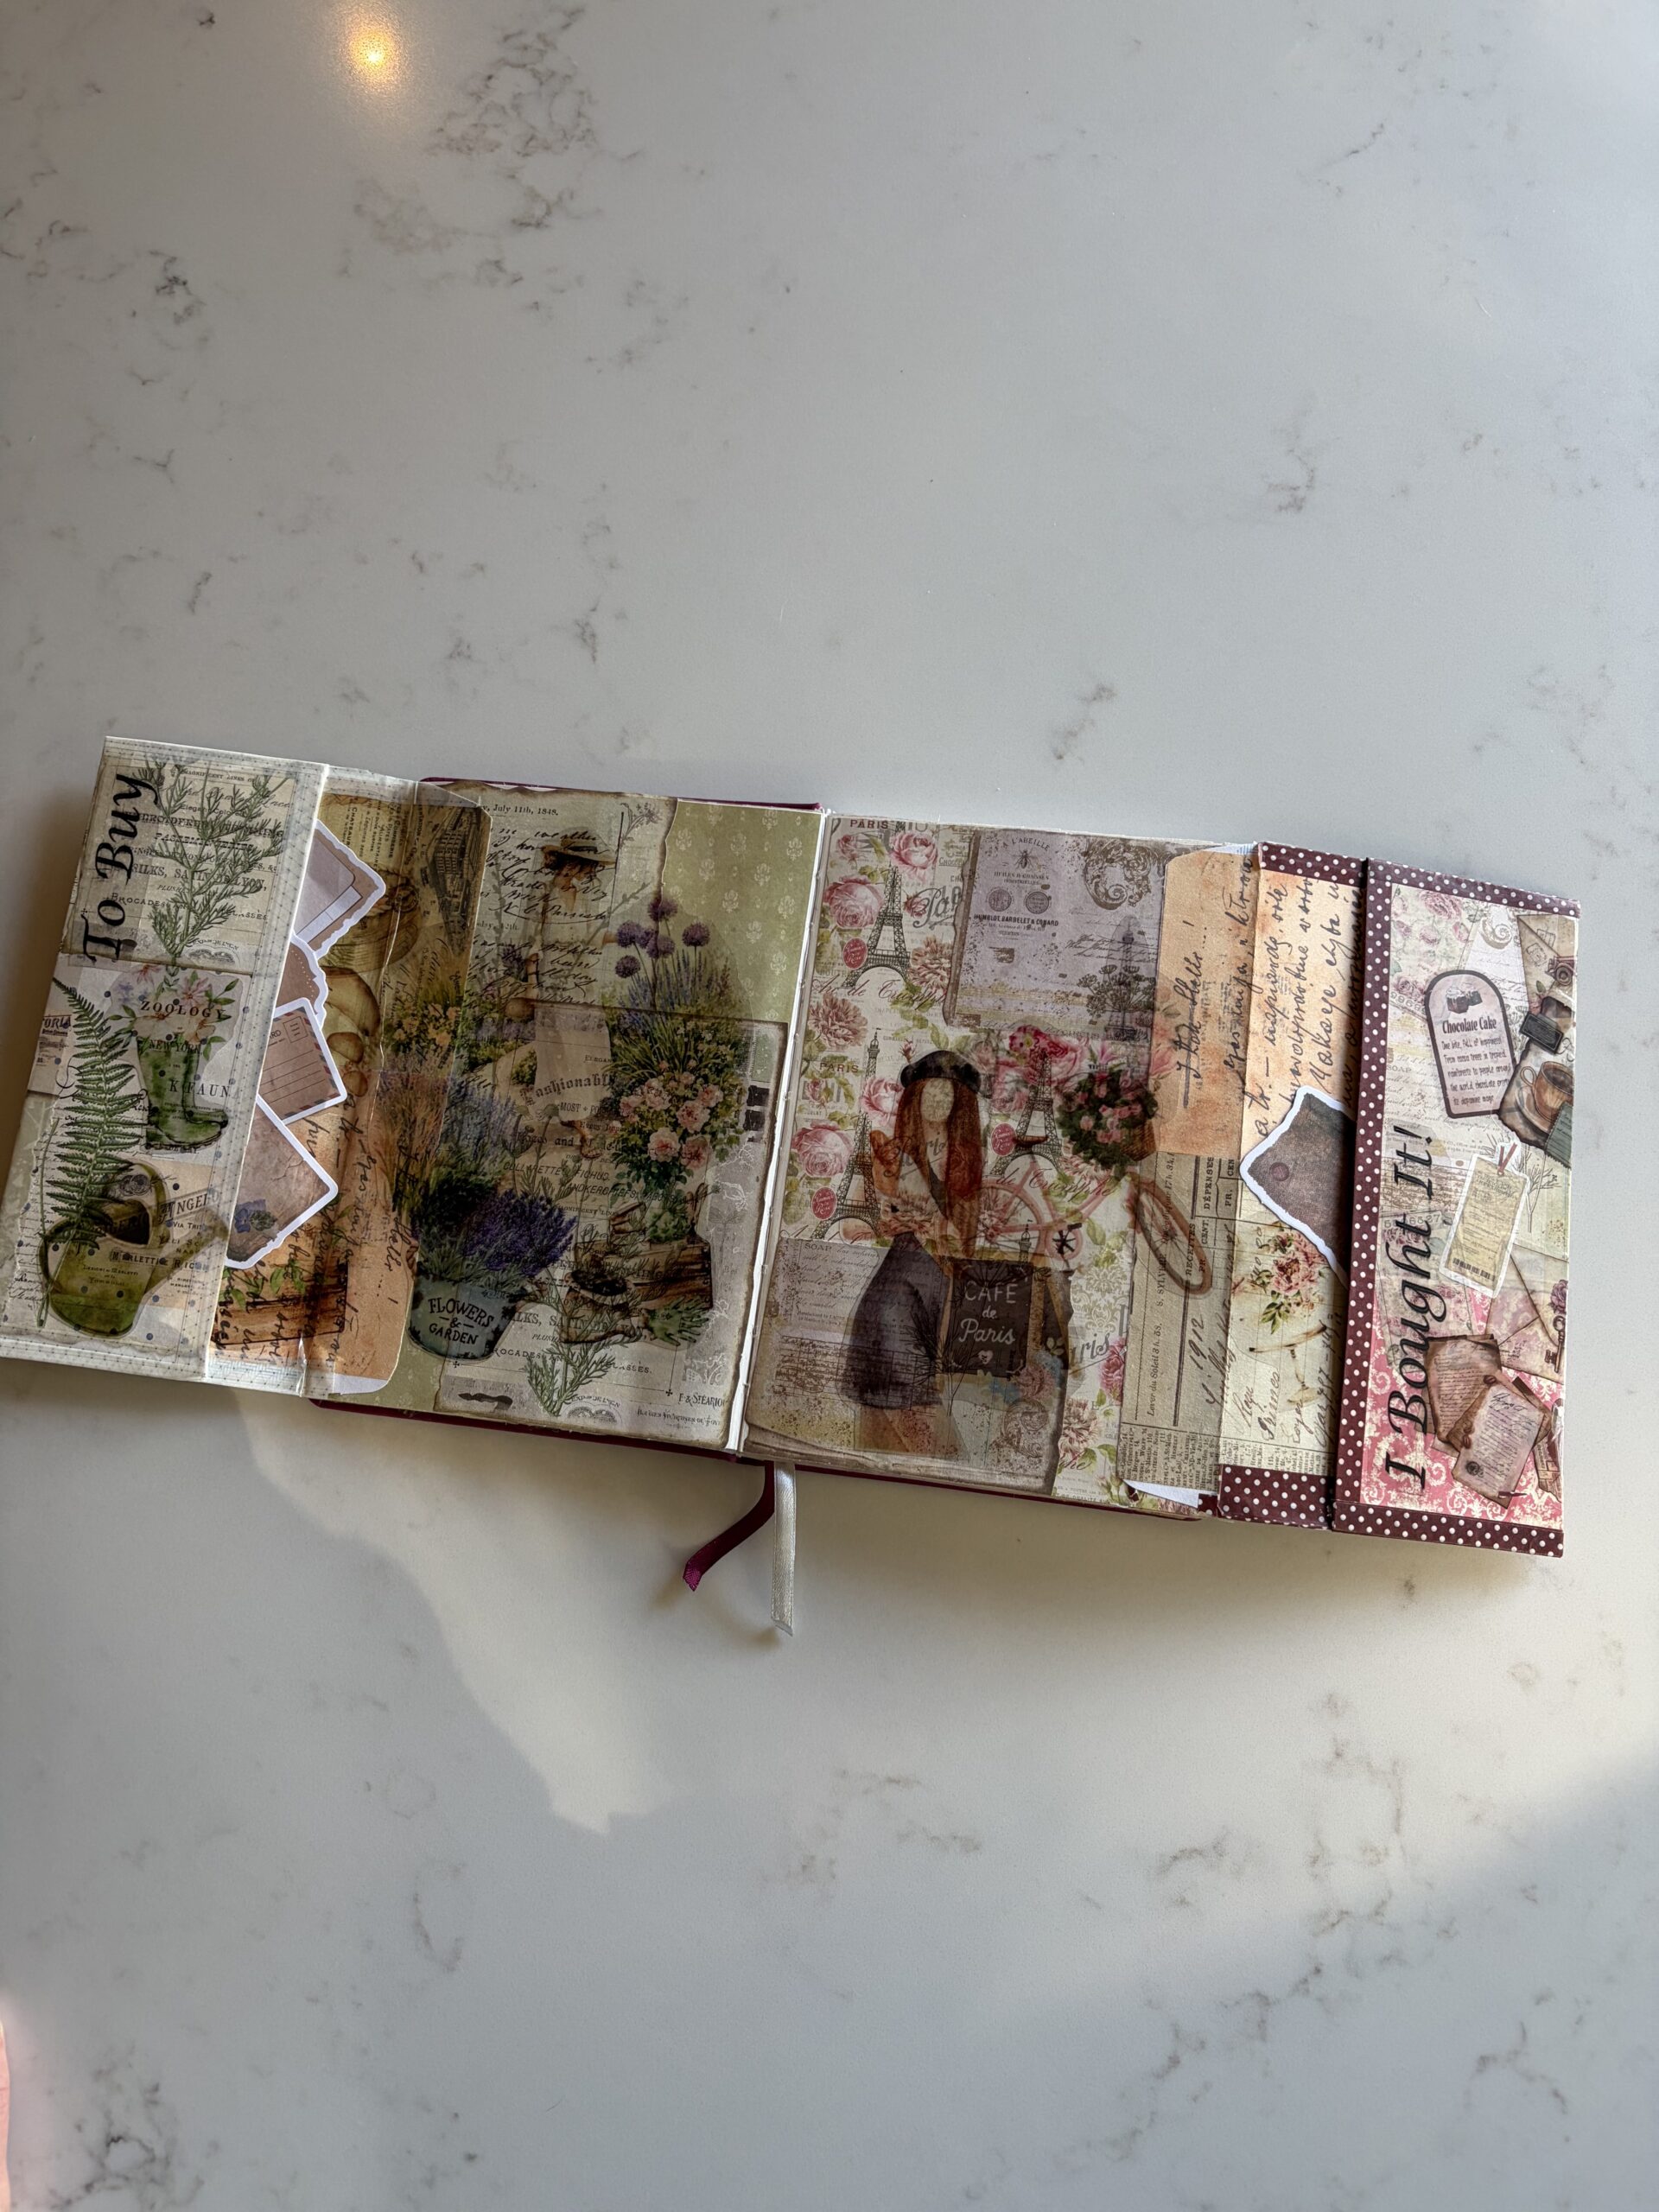
Full spread with both envelope pockets opened out.
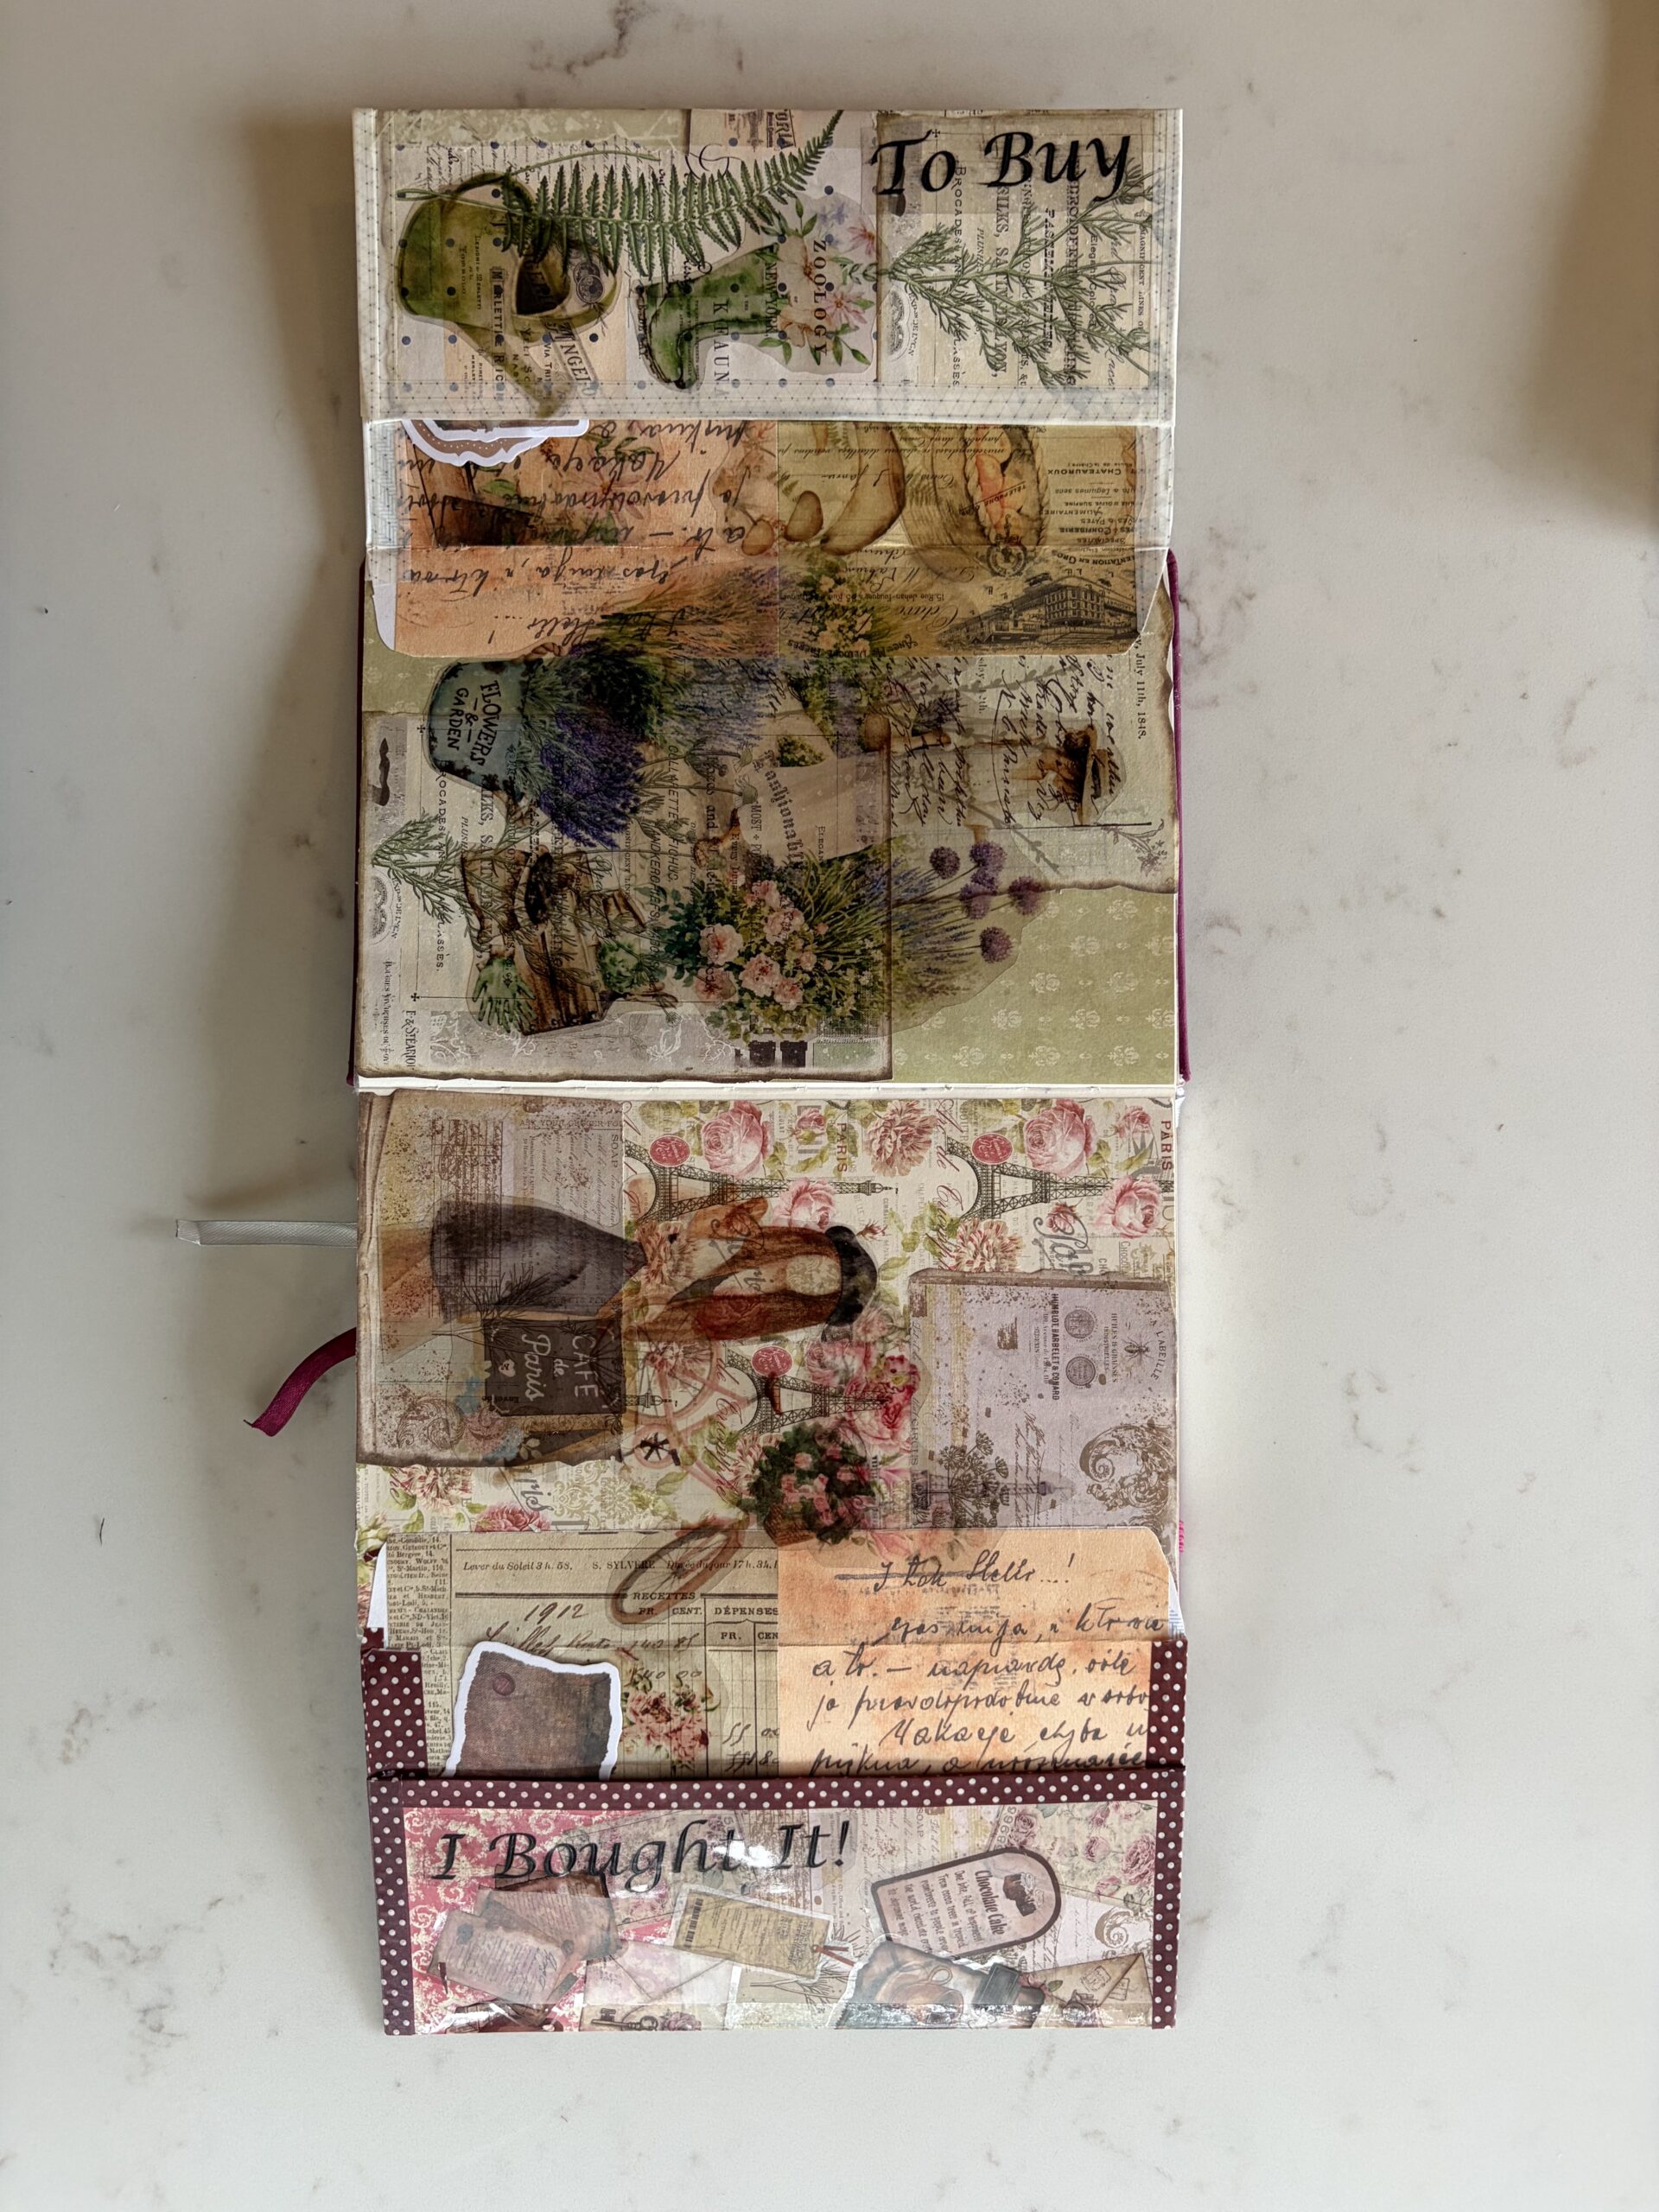
Full spread.
what to use your pockets for
You can use your pockets for all manner of things – I’ve used these pockets to store little notes of all the amazing things I want to buy – those notes go in the left hand pocket, and once I have bought things on my notes I move them to the right side pocket.
You can use your pockets for anything! To do lists, little motivational notes you can pull out when you need them, favourite photos, notes about books you want to read – the opportunities are endless.
FAQ’s
Do I need a special type of envelope to make junk journal pockets?
No – any old envelope works. It doesn’t matter if the sealing tab is rectangular or triangular, you can cover either shape with ephemera once it’s stuck in your journal.
Will the envelope rip when I open it flat?
It might, and that’s fine. Small rips and tears won’t show once you’ve covered the inside and outside with your junk journal scraps – it’s a very forgiving process.
Should I glue or tape the envelope closed?
Washi tape or cellotape is better than glue here. Glue can seal too much of the inside, making it harder to slip things in and out once the pocket’s finished.
Do I need to cover the whole envelope with ephemera?
Not unless you want to! There are no rules here except to be sure to leave the top rectangular tab uncovered on the outside – that’s the part that glues into your journal and stays hidden.
Can I fit these pockets into any junk journal?
Yes, although you may need to trim the envelope slightly to fit your journal’s page size. Always check placement before you start covering it in ephemera.
What can I keep inside my envelope pockets?
Anything you like – to-do lists, notes of things you want to buy, motivational notes, photos, or reading lists. They’re a simple way to add a functional, interactive element to a spread.
WRAPPING UP
I hope you’ve enjoyed this how to turn old envelopes into junk journal pockets guide.
You’ll find lots of other tips, tutorials and spread ideas in my other blog posts, and if you’re just starting your Life Junk Journal journey I have a simple junk journal starter kit to help you take the first steps. You can grab that here.
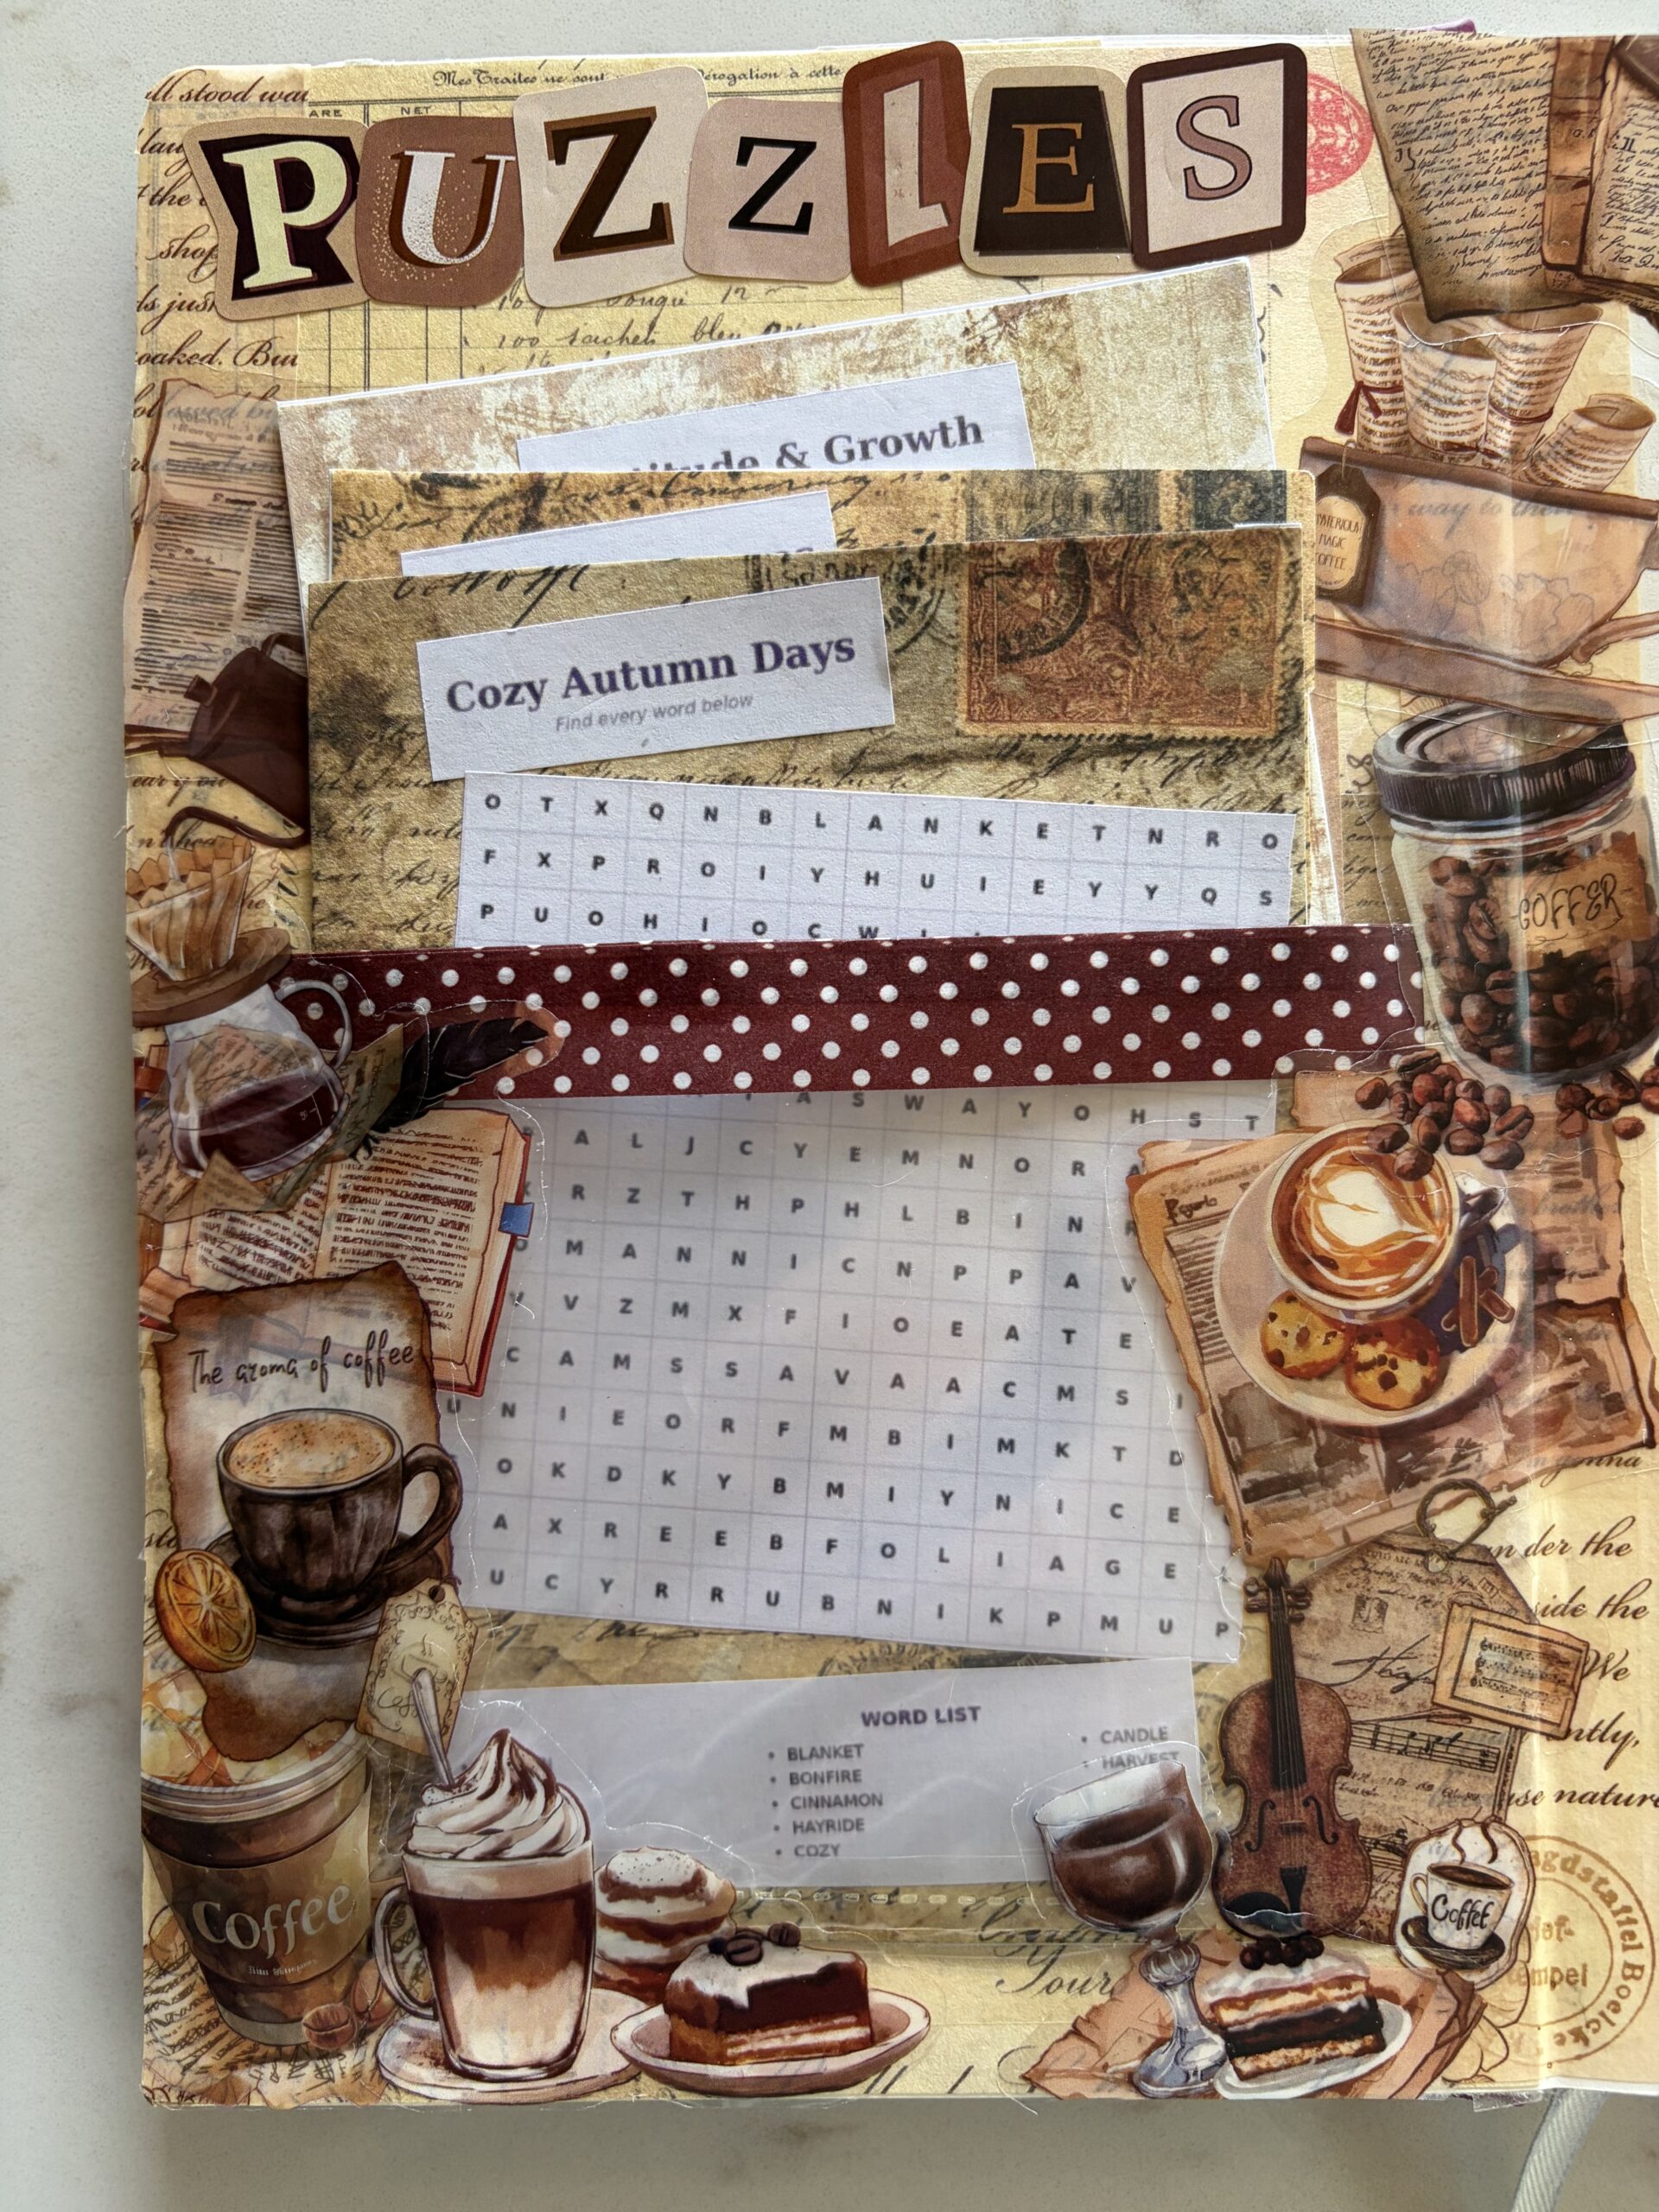
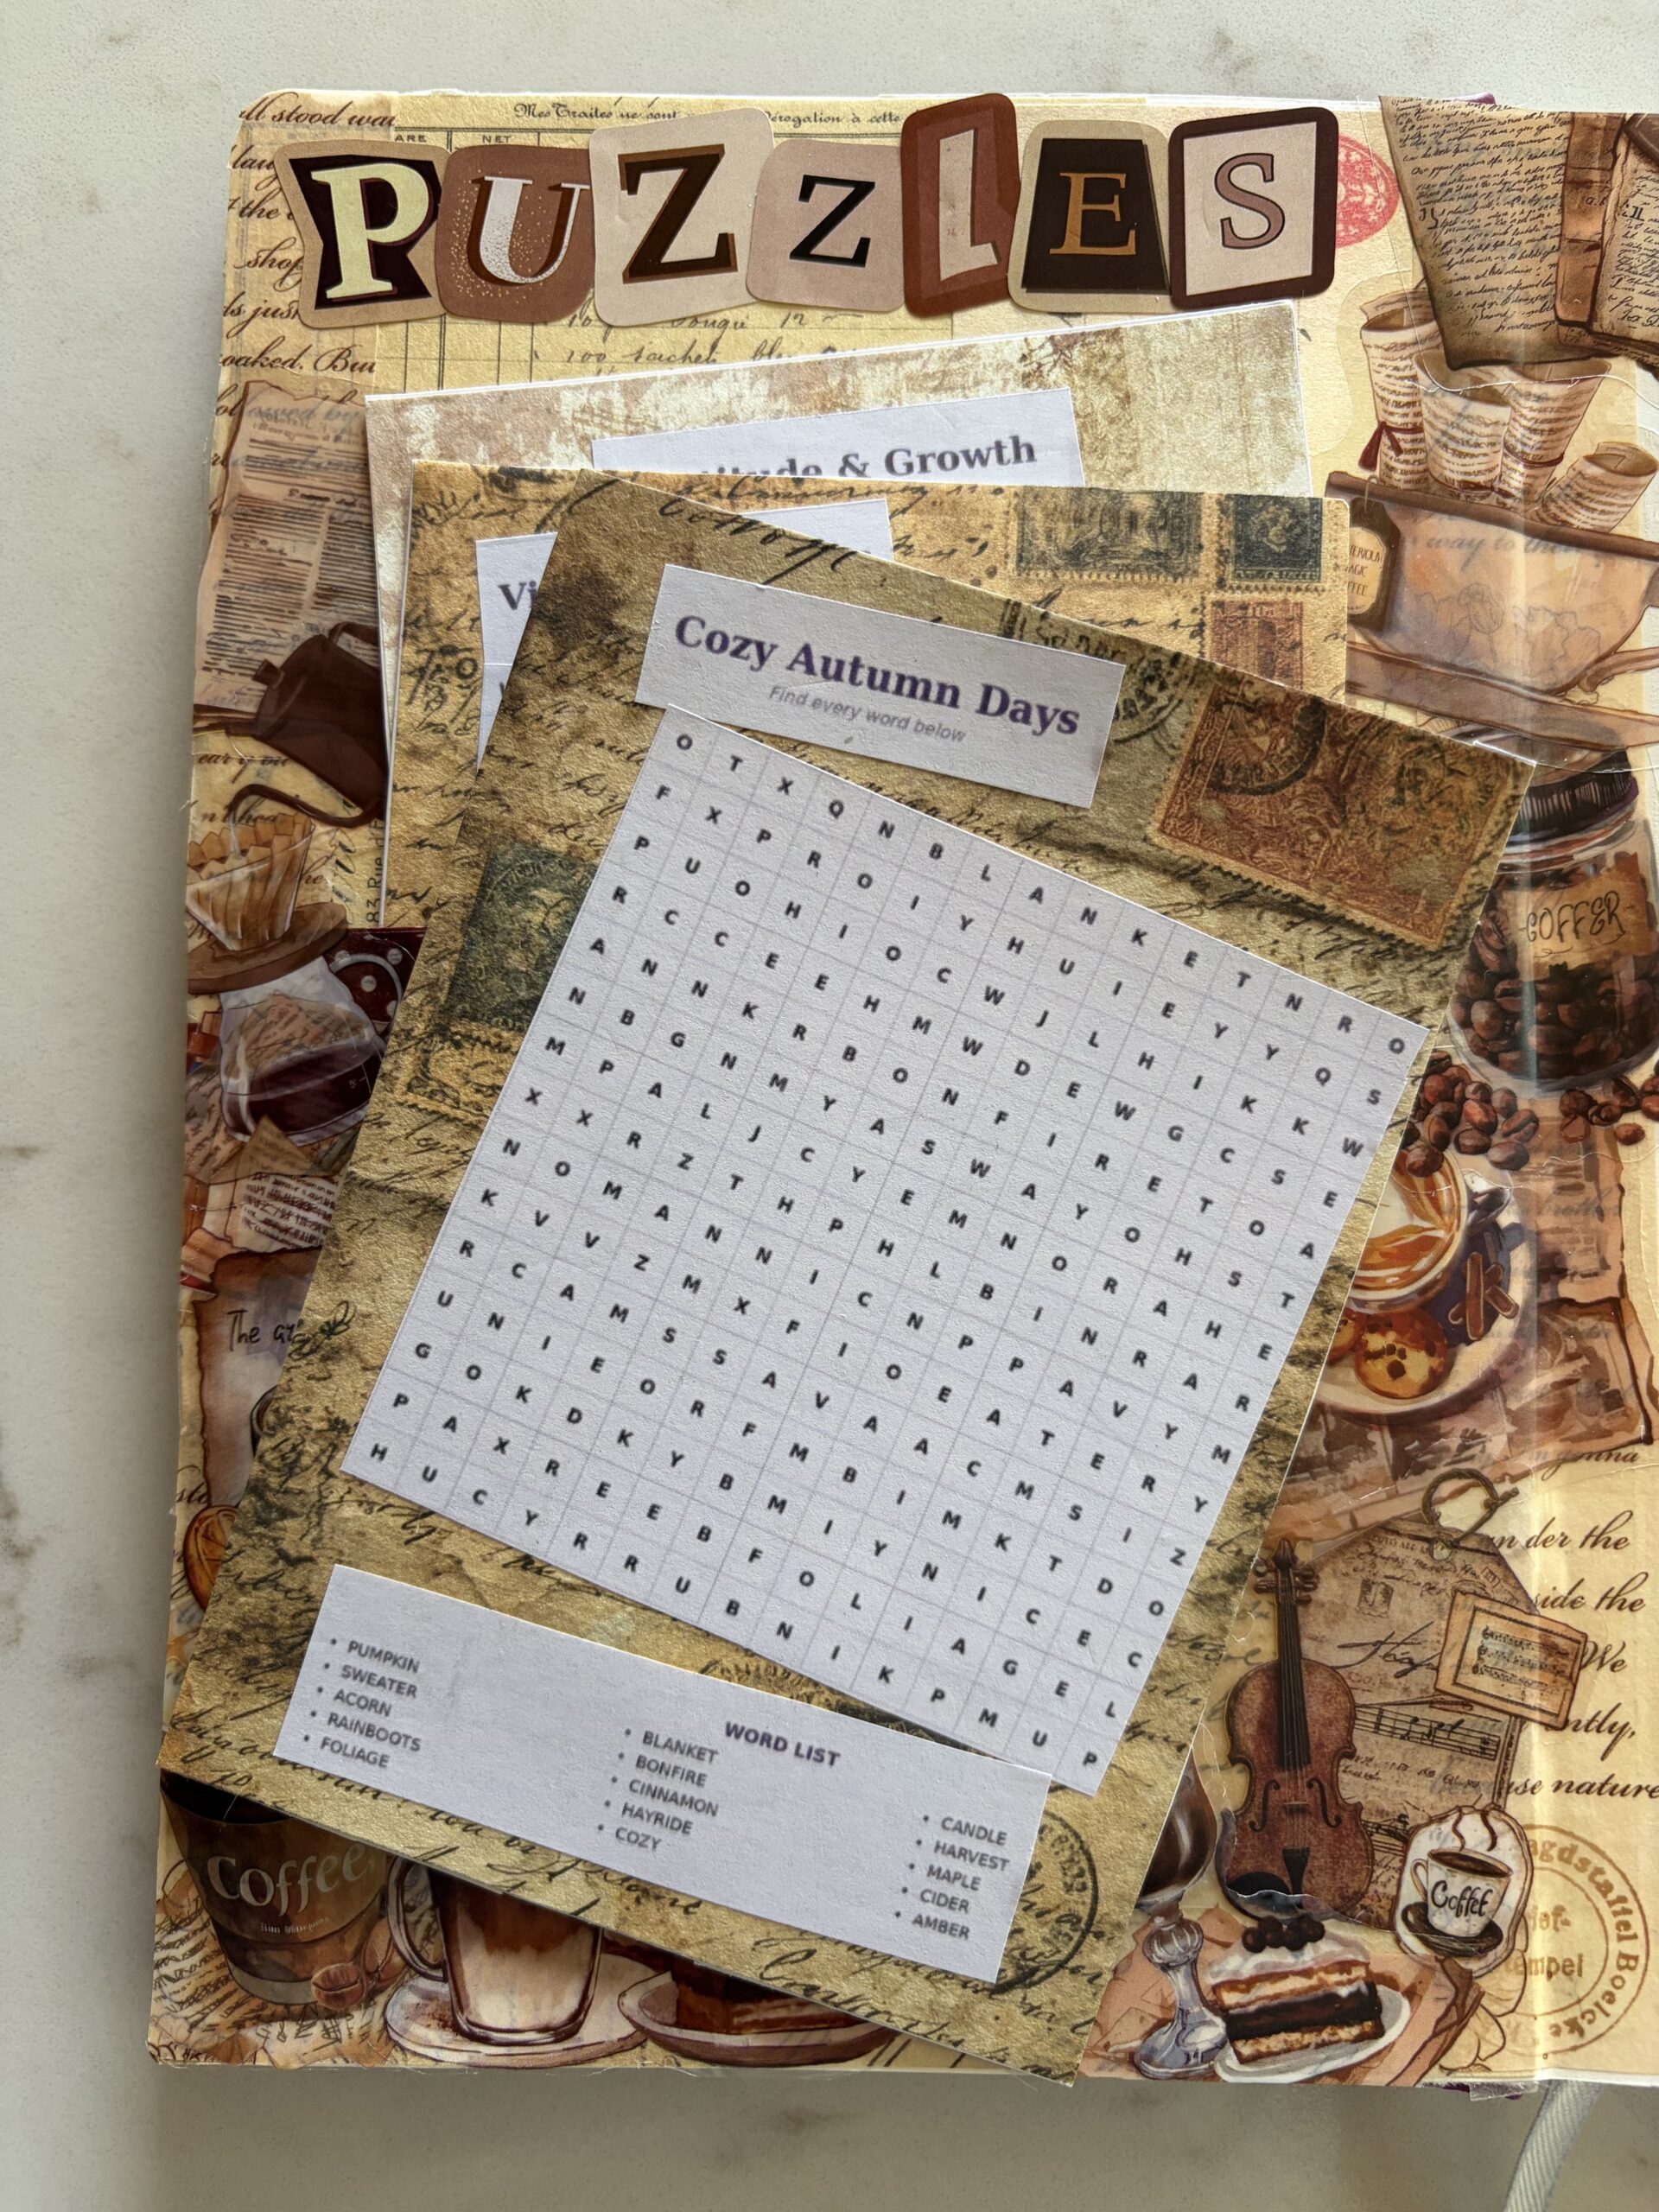
I’ve also got another cool freebie for you! It’s eight Word Search puzzles you can add to a Life Junk Journal spread you create, and the Word Search puzzles can keep you occupied in quiet moments – like when you’re waiting at an appointment, or when you just want to sit and have fun with a puzzle.
You can find out more about the Word Search puzzle free resource here.
I loved creating this puzzle spread in my Life Junk Journal, and adding the Word Search puzzles to it.
I’ll also give you a prompt inside this freebie that shows you how to create even more Word Search puzzles for your Life Junk Journal using an AI prompt.